
Why Pump Leaks at Seal: How to Find the Real Cause Before Replacing Another Seal
Introduction
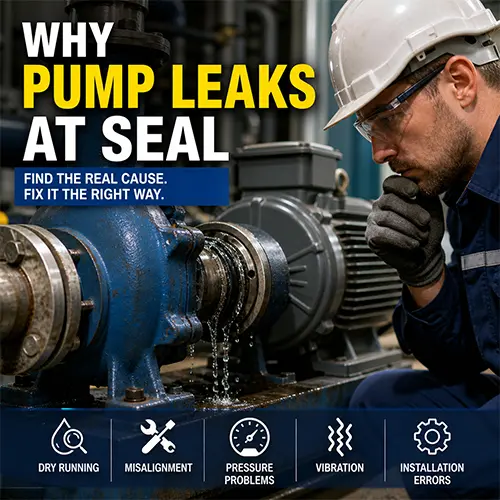
When a pump leaks at the seal, many users immediately think the mechanical seal has failed and should be replaced. That reaction is understandable, because the leak is visible at the seal area. However, in real pump systems, the seal is often not the first thing that went wrong. It is usually the part that shows the problem first.
A mechanical seal works only when the pump is operating under stable conditions. It needs liquid for cooling and lubrication, stable shaft movement, correct pressure, proper alignment, and clean installation. If any of these conditions are wrong, even a new seal can start leaking quickly.
This is why many users replace a seal, restart the pump, and then see the same leak return after a few days or weeks. The real issue was never the seal alone. The system was damaging the seal.
The correct question is not simply:
“Why is the seal leaking?”
The better question is:
“What condition is making the seal leak, and will the new seal fail again if I do not fix it?”
This guide explains how to judge the leak, decide whether the pump can keep running, identify the real cause, and decide whether you should replace the seal, repair another component, or correct the system first.
First, Decide Whether the Seal Leak Is Safe to Monitor or Requires Shutdown
Not every seal leak has the same level of urgency. A small, stable drip is different from a fast leak, spray, or leakage combined with heat and vibration. Before you remove the seal or order spare parts, decide whether the pump can safely continue running for a short inspection period.
If the leak is light and stable, you may have time to observe the pump, record symptoms, and plan maintenance. If the leak is increasing, spraying, or appears together with abnormal heat, noise, or vibration, the safest decision is to stop the pump. Continued operation can damage the shaft sleeve, bearings, coupling, and motor.
| Seal Leak Condition | Risk Level | Best Decision |
| Light, stable dripping | Low | Monitor briefly and plan repair |
| Continuous leakage | Medium | Schedule shutdown soon |
| Leakage increasing quickly | High | Stop and inspect |
| Spray, heat, vibration, or noise | Severe | Stop immediately |
The key point is that seal leakage is not only a sealing problem. Once liquid escapes through the seal area, nearby components may also be affected. A small planned repair can become a larger repair if the pump continues running under unstable conditions.
Look at the Leak Pattern Before You Replace the Seal
The leak pattern gives important clues. A seal that leaks immediately after installation does not have the same cause as a seal that leaks after months of service. A leak after dry running does not mean the same thing as a leak that appears together with vibration.
If the pump leaks only during startup, the seal may have suffered from dry running or poor lubrication. If leakage increases slowly over time, wear, misalignment, or pressure fluctuation may be involved. If a new seal leaks right after installation, installation quality, seal face contamination, wrong compression, or shaft sleeve damage should be checked first.
| What You See | What It Often Means | What to Check First |
| Leak immediately after installation | Installation error or damaged sleeve | Seal seating and sleeve surface |
| Leak after no-flow condition | Dry running damage | Priming and water supply |
| Leak with vibration | Shaft instability | Bearings and alignment |
| Leak increases with pressure | Pressure or system issue | Discharge side and operating point |
| New seal leaks again quickly | Root cause not fixed | Full system condition |
Pressure Problems Can Force Leakage Through the Seal Area
Mechanical seals are designed to operate within a pressure range. If the pump runs under abnormal pressure, the seal may leak even if it is correctly installed.
High pressure can overload the seal faces. Pressure fluctuation can disturb the sealing film. Sudden pressure spikes can damage seal components quickly. This often happens when discharge valves are closed too far, downstream piping is blocked, check valves are stuck, or the pump is operating away from its intended duty point.
If leakage increases when pressure rises, or if the leak appears after system changes, you should inspect the discharge side before blaming the seal. Check valve positions, pressure readings, downstream blockage, and recent piping changes.
A seal is not designed to correct a system pressure problem. It can only work reliably when the system operates within expected conditions.
Poor Installation Can Make a New Seal Leak Immediately
If a new seal leaks immediately after replacement, the cause is often installation-related. Mechanical seal faces are precision surfaces. Dirt, scratches, fingerprints, wrong compression, incorrect assembly sequence, or damaged O-rings can cause leakage right away.
The shaft sleeve is also critical. If the sleeve has grooves, scoring, corrosion, or wear where the seal contacts it, a new seal may not seat properly. In that case, replacing only the seal will not solve the leak.
Before installing another seal, inspect the seal chamber, shaft sleeve, O-rings, and mating surfaces. Cleanliness matters. Correct compression matters. The installation sequence matters.
If the pump has repeated seal leakage and other components are also aging, it may be worth reviewing whether the original pump selection and application conditions are still correct. The Before You Buy a Pump Checklist can help buyers and maintenance teams avoid repeated failures caused by wrong duty conditions, material mismatch, or poor installation assumptions.
Decide Whether to Replace the Seal, Repair the Pump, or Correct the System First
After checking the leak pattern, dry running, suction condition, vibration, pressure, and installation quality, the decision becomes clearer.
If the seal is worn after long service and no other abnormal conditions exist, replacing the seal may be enough. If the seal failed quickly, leaked immediately after installation, or failed together with vibration, heat, or no-flow operation, the root cause must be corrected first.
| What You Found | Best Action |
| Normal wear only | Replace seal |
| Dry running or no-flow history | Fix flow issue, then replace seal |
| Vibration or bearing noise | Repair mechanical issue first |
| Pressure fluctuation | Correct system pressure first |
| Damaged shaft sleeve | Replace sleeve and seal |
| Installation error | Reinstall correctly |
| Repeated failures with old pump | Evaluate repair vs replacement |
For B2B users, the cheapest visible repair is not always the lowest-cost decision. Replacing a seal is cheaper than correcting the system, but repeated seal failures create downtime, labor cost, spare parts cost, and production risk.
The right decision is not “replace or not replace.” The right decision is:
“What must be fixed before the new seal can survive?”
FAQ About Pump Seal Leakage
When a pump leaks at the seal, users usually need to decide whether to stop, monitor, repair, or replace. These questions focus on practical field decisions, not theory.
Can I keep running the pump if the seal is leaking?
You can only continue for a short time if the leak is very small, stable, and there is no heat, vibration, abnormal noise, or safety risk. If the leak is increasing, spraying, or combined with vibration or heat, the pump should be stopped.
Running too long with a leaking seal can damage the shaft sleeve, bearings, and motor. A small leak can become a much larger repair if the cause is ignored.
Why does a new pump seal leak again after replacement?
A new seal usually leaks again because the root cause was not fixed. Common causes include dry running, suction air leaks, vibration, misalignment, pressure fluctuation, damaged shaft sleeve, or incorrect installation.
If the new seal leaks quickly, do not assume the seal quality is bad first. Check the operating conditions around the seal.
How do I know whether the seal itself is bad or the system is causing the leak?
Look at when and how the leak appears. If the seal leaks after dry running, vibration, pressure changes, or no-flow operation, the system is likely causing the problem. If the seal leaks immediately after installation, check installation and shaft sleeve condition.
If the seal leaks after long service without other symptoms, normal wear is more likely.
Should I replace only the seal or also replace the shaft sleeve?
Replace the shaft sleeve if it has grooves, scoring, corrosion, or visible wear where the seal contacts it. A new seal installed on a damaged sleeve may leak quickly.
If the sleeve surface is smooth and within acceptable condition, seal replacement alone may be enough.
What is the most common reason a pump seal leaks?
One of the most common reasons is dry running or unstable liquid supply. Mechanical seals need liquid for cooling and lubrication. If the pump runs without proper flow, the seal faces can overheat and fail.
Misalignment, vibration, pressure problems, and poor installation are also common causes.
When should I replace the whole pump instead of repairing the seal?
Pump replacement becomes worth considering when seal leakage repeats, the shaft sleeve is damaged, bearings are worn, the casing or seal chamber is corroded, and downtime cost is becoming higher than repair value.
If only the seal is worn and the pump body is still healthy, repair is usually reasonable. If several components are failing together, replacement may be more economical.
Conclusion
When a pump leaks at the seal, the visible leak is only the starting point of diagnosis. The seal may be worn, but it may also be reacting to a deeper system problem.
A reliable repair starts by reading the symptoms correctly. A leak after no-flow operation points toward dry running. A leak with vibration points toward shaft instability. A leak after installation points toward installation quality or sleeve condition. A leak under changing pressure points toward system operation.
Replacing the seal is often necessary, but it should be the final repair step, not the first guess.
The most important rule is simple:
A seal will only last when the pump system gives it stable operating conditions.
Fix the cause first, then replace the seal. That is how you stop repeat leakage instead of paying for the same repair again.
Get A Quote

Get A Quote
0 Comments