
Complete Pump Troubleshooting Checklist by Pump Type: Causes, Checks, and Fixes
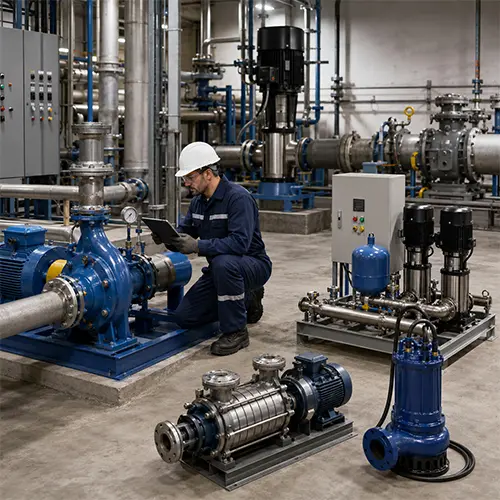
Complete pump troubleshooting starts with identifying the pump type before checking symptoms. A centrifugal pump, submersible pump, booster pump, multistage pump, sewage pump, slurry pump, chemical pump, and diesel-driven pump can show similar symptoms, but the root causes and safe troubleshooting steps are not the same.
A pump that has low flow, no pressure, high current, vibration, leakage, abnormal noise, overheating, or repeated trips should not be repaired blindly. The correct decision is to confirm the pump type, record the symptom, measure electrical and hydraulic data, inspect the most failure-prone components, and then decide whether the problem is electrical, hydraulic, mechanical, control-related, installation-related, or selection-related.
A complete pump troubleshooting checklist should help the user answer five practical questions: What type of pump do I have? What symptom is happening? What should I check first? Can this be repaired on site? And when does the failure mean the pump or system was selected incorrectly?
Scope of This Checklist: Which Pump Types Does This Guide Cover?
This complete pump troubleshooting checklist covers common industrial, commercial, municipal, agricultural, and water transfer pump problems. It is written for maintenance teams, engineers, contractors, buyers, operators, and distributors who need a practical first-pass diagnosis before deciding whether to repair, adjust operation, or contact a supplier.
This guide should be used by pump type. Each pump design has different failure patterns, operating limits, and inspection priorities. A low-flow problem in an end suction centrifugal pump may point to cavitation or impeller wear, while the same low-flow symptom in a submersible pump may point to low water level, blockage, or cable voltage drop.
| Pump Type | Covered in This Guide? | Main Troubleshooting Focus |
| End suction centrifugal pump | Yes | Suction, cavitation, impeller, seal, bearing, motor load |
| Split case pump | Yes | Large flow, alignment, bearing, vibration, casing pressure |
| Multistage pump | Yes | Stage wear, high pressure, balance, seal, bearing temperature |
| Pipeline / inline pump | Yes | Flow restriction, air pockets, motor load, installation stress |
| Booster pump system | Yes | Pressure tank, sensor, VFD, dry-run, pressure fluctuation |
| Submersible pump | Yes | Water level, cable, motor cooling, blockage, dry-run protection |
| Sewage pump | Yes | Clogging, float switch, impeller blockage, solids handling |
| Slurry pump | With adjustment | Abrasion, solids concentration, impeller wear, liner wear |
| Chemical pump | With safety adjustment | Chemical compatibility, seal plan, vapor pressure, leakage risk |
| Diesel-driven pump | With adjustment | Engine starting, cooling, fuel, coupling, suction condition |
| Fire pump | Limited | Follow fire pump codes and certified inspection rules |
This checklist should not be used as the only method for hazardous chemical transfer, certified fire pump acceptance testing, explosive liquids, boiler feed pumps, API process pumps, high-temperature process pumps, food/pharma sanitary pumps, or high-voltage submersible pumps. Those cases require the equipment manual, project specifications, site safety procedures, and supplier engineering review.
What Is a Complete Pump Troubleshooting Checklist?
A complete pump troubleshooting checklist is a structured diagnostic process that identifies the pump type, confirms the symptom, checks electrical, hydraulic, mechanical, control, liquid, and installation conditions, and then decides whether the pump should be repaired, operated differently, upgraded, redesigned, or reselected.
A complete checklist should not only ask “Which part failed?” It should also ask “Why did that part fail?” A mechanical seal may leak because of dry running. A motor may burn because of high current or low voltage. A bearing may overheat because of misalignment, vibration, or poor lubrication. A pump may lose flow because of suction problems, blockage, worn internals, or incorrect selection.
The purpose of a complete pump troubleshooting checklist is to reduce repeat failure. If the checklist only leads to replacing the damaged component, the same problem may return. If the checklist identifies the real operating trigger, the user can make a better decision: repair the pump, adjust the system, change operation, upgrade components, or select a different pump.
Complete Pump Troubleshooting Checklist
A complete pump troubleshooting checklist should start by identifying the pump type, confirming the symptom, checking electrical data, inspecting suction and discharge conditions, reviewing flow and pressure, checking mechanical components, and comparing actual operating conditions with the original pump selection.
Pump troubleshooting should not begin with replacing parts. The correct sequence is to identify the pump type, record the symptom, measure current and voltage, check suction condition, compare flow and pressure with the pump curve, inspect seals and bearings, review operating history, and then decide whether the issue is electrical, hydraulic, mechanical, installation-related, control-related, liquid-related, or selection-related.
Direct Answer for Fast Diagnosis
A complete pump troubleshooting checklist should never treat all pumps the same. Start with the pump type, then check power supply, motor current, suction condition, discharge pressure, flow rate, seal leakage, bearing temperature, vibration, blockage, control signals, liquid properties, and whether the pump is operating within its selected duty point.
The fastest way to troubleshoot a pump is to match the symptom to the pump type. Low flow, no pressure, overheating, vibration, leakage, high current, noise, and repeated trips can mean different things depending on whether the pump is centrifugal, submersible, booster, multistage, slurry, sewage, chemical, or diesel-driven.
Find Your Pump Type First
Pump troubleshooting becomes easier when users can quickly locate their pump type. This table helps operators, maintenance teams, and buyers decide which section to check first and what the most important first inspection should be.
| If You Use This Pump | Go to This Section | Most Important First Check |
| End suction centrifugal pump | End Suction Centrifugal Pump Checklist | Suction, prime, cavitation, rotation |
| Split case pump | Split Case Pump Checklist | Alignment, bearing temperature, pipe stress |
| Multistage pump | Multistage Pump Checklist | Pressure loss, minimum flow, stage wear |
| Pipeline / inline pump | Pipeline / Inline Pump Checklist | Air pockets, pipe stress, flow restriction |
| Booster pump system | Booster Pump System Checklist | Pressure tank, sensor, VFD, demand changes |
| Submersible pump | Submersible Pump Checklist | Water level, cable, blockage, cooling |
| Sewage pump | Sewage Pump Checklist | Float switch, impeller blockage, check valve |
| Slurry pump | Slurry Pump Checklist | Wear, solids concentration, liner/impeller condition |
| Chemical pump | Chemical Pump Checklist | Liquid compatibility, seal material, leakage safety |
| Diesel-driven pump | Diesel-Driven Pump Checklist | Battery, fuel, engine cooling, suction condition |
This navigation table should be used before diagnosing the symptom. A generic checklist may collect useful data, but pump-type diagnosis prevents customers from applying the wrong repair logic to the wrong pump.
First Safety Decision: When Should You Stop the Pump Immediately?
Pump troubleshooting should begin with safety because some symptoms can quickly damage the motor, seal, bearing, shaft, impeller, casing, cable, or connected piping. If the pump shows severe warning signs, stop the equipment before collecting detailed performance data.
A pump that runs dry, cavitates loudly, trips repeatedly, leaks heavily, vibrates strongly, or smells like burning should not be restarted repeatedly. Repeated restart attempts often turn a correctable problem into motor failure, seal destruction, bearing damage, or major downtime.
| Warning Sign | Why It Is Dangerous | Immediate Action |
| Pump runs dry | Mechanical seal can fail quickly | Stop pump and restore liquid supply |
| Loud cavitation noise | Impeller and casing may be damaged | Stop or reduce load, check suction |
| Motor trips repeatedly | Motor insulation and control parts may fail | Stop repeated restart attempts |
| Heavy vibration | Bearing, shaft, seal, and piping damage risk | Stop and inspect alignment / hydraulics |
| Fast-growing seal leakage | Bearing contamination and fluid loss risk | Stop and inspect seal system |
| Bearing housing very hot | Bearing seizure or shaft damage risk | Stop and check lubrication/alignment |
| Burning smell from motor/cables | Electrical failure risk | Isolate power and inspect |
| Sudden pressure collapse | Dry-run, blockage, or system failure risk | Stop and check suction/discharge |
If the pump can safely run for a short diagnostic test, monitor motor current, voltage, suction condition, discharge pressure, vibration, temperature, and leakage during the test. If any value becomes abnormal, stop the pump and move to static inspection.
When NOT to Troubleshoot the Pump on Site
Some pump problems should not be diagnosed by normal maintenance staff without proper procedure, tools, and authorization. The safety risk may be higher than the equipment cost, especially when hazardous liquid, high voltage, fire pump compliance, severe vibration, or electrical burning is involved.
This section helps users decide when to stop field troubleshooting and escalate to qualified electrical, mechanical, safety, or supplier support.
| Situation | Why On-Site Troubleshooting Is Risky | Better Action |
| Hazardous chemical leakage | Exposure, burn, toxicity, or reaction risk | Follow plant safety and isolation procedure |
| High-voltage submersible pump fault | Electric shock and insulation failure risk | Use qualified electrical testing |
| Certified fire pump performance issue | Code compliance and safety responsibility | Follow approved fire pump procedure |
| Severe vibration with pipe movement | Shaft, coupling, foundation, or piping damage risk | Stop pump and inspect foundation/piping |
| Burning smell from motor or cable | Electrical fire or insulation failure risk | Isolate power and test motor/cable |
| Unknown chemical compatibility | Seal or material may fail dangerously | Review liquid data and material compatibility |
| Explosive or flammable liquid service | Fire and explosion risk | Follow hazardous-area procedure |
| Pressurized hot liquid leakage | Burn and pressure release risk | Depressurize and cool system first |
A good troubleshooting process includes knowing when not to continue. If the risk is high, the correct decision is not faster repair; it is controlled isolation, documentation, and qualified inspection.
Universal Pump Troubleshooting Checklist Before Checking Pump Type
A universal pump troubleshooting checklist helps users collect baseline data before going into pump-specific diagnosis. These checks apply to most pump types, but the interpretation depends on pump design and application.
The goal of this section is not to solve every problem immediately. The goal is to prevent blind repair. A supplier or maintenance engineer can make a much better diagnosis when the pump type, symptom, electrical data, suction condition, flow, pressure, liquid condition, and operating history are available.
Step 1: Identify the Exact Pump Type
Pump troubleshooting should begin by confirming the exact pump type, not just calling it a “water pump.” Different pump types have different failure logic.
Common pump types include end suction centrifugal pumps, split case pumps, multistage pumps, pipeline or inline pumps, booster pump systems, submersible pumps, sewage pumps, slurry pumps, chemical pumps, and diesel-driven pumps. If the nameplate, catalog, or supplier documentation is available, use it to confirm the model, speed, power, flow, head, material, and operating range.
Step 2: Record the Main Symptom
Pump symptoms should be recorded before parts are removed. The most useful symptom descriptions include whether the pump does not start, runs but produces no flow, produces low flow, produces low pressure, produces high pressure, draws high current, trips repeatedly, overheats, leaks at the seal, has hot bearings, vibrates, makes cavitation noise, clogs frequently, or starts and stops repeatedly.
A clear symptom record prevents confusion. “The pump is bad” is not useful. “The pump starts, draws high current, makes gravel-like noise, and loses flow after 10 minutes” is useful.
Step 3: Collect Basic Operating Data
Pump troubleshooting becomes much more accurate when the user collects operating data. The most important data are pump model, flow rate, discharge pressure, suction pressure or water level, motor current, voltage, liquid type, liquid temperature, runtime before failure, noise pattern, vibration pattern, and recent maintenance history.
| Data to Record | Why It Matters |
| Pump model | Confirms pump type and curve |
| Flow rate | Shows whether pump meets duty |
| Discharge pressure | Indicates system resistance |
| Suction pressure / water level | Shows suction margin |
| Motor current | Confirms overload or underload |
| Voltage and phase balance | Detects power supply issue |
| Liquid temperature | Affects cavitation and seal life |
| Liquid type | Affects material, seal, viscosity, and corrosion |
| Runtime before failure | Reveals heat accumulation or duty issue |
| Noise/vibration pattern | Helps separate hydraulic and mechanical issues |
| Recent maintenance/change | Identifies installation or operation trigger |
If the pump shows air, loss of prime, or cavitation-like noise, this air inside pump troubleshooting guide can help maintenance teams check suction leaks, air pockets, and priming problems before replacing parts.
Best First Check by Pump Symptom
Pump troubleshooting should start with the symptom, but the first check must be selected carefully. Many users lose time because they check the failed part first instead of checking the condition that caused the failure.
This table gives a fast first-check path before the user enters the pump-type-specific checklist.
| Symptom | Best First Check | Why It Matters |
| Pump does not start | Power supply, control signal, protection status | Confirms whether the issue is electrical or control-related |
| Pump runs but no flow | Prime, suction, intake, rotation direction | Most no-flow issues happen before the pump can move liquid |
| Low flow | Suction, impeller, blockage, pump curve | Flow loss may be hydraulic, mechanical, or selection-related |
| Low pressure | Flow rate, discharge restriction, worn internals | Pressure loss may come from system or pump wear |
| High current | Motor current, voltage, flow/head | Confirms overload, electrical issue, or wrong duty |
| Vibration | Cavitation, alignment, bearing, foundation | Separates hydraulic from mechanical causes |
| Seal leakage | Dry-run, vibration, seal chamber condition | Prevents repeated seal replacement |
| Bearing overheating | Lubrication, alignment, vibration, load | Prevents bearing and shaft damage |
| Repeated trip | Alarm code, current, voltage, protection logic | Avoids damaging motor/control system |
| Abnormal noise | Cavitation, bearing wear, impeller contact | Identifies whether noise is hydraulic or mechanical |
| Frequent clogging | Solids size, strainer, impeller type | Determines whether pump design matches the liquid |
| Corrosion or material loss | Liquid chemistry, material grade, temperature | Prevents replacing with the same wrong material |
This table is useful for quick triage. After the first check, the user should move into the specific pump type section to avoid applying a generic conclusion to a specialized pump.
End Suction Centrifugal Pump Troubleshooting Checklist
End suction centrifugal pump troubleshooting should focus on suction condition, cavitation, impeller wear, mechanical seal leakage, bearing condition, motor load, and operation away from the best efficiency point. This is one of the most common pump types, but it is also one of the most commonly misdiagnosed.
End suction pumps are very sensitive to suction piping, priming, air entry, NPSH (Net Positive Suction Head, the suction pressure margin needed to avoid vapor formation), and operation away from BEP (Best Efficiency Point, the most stable and efficient pump operating zone). Many repeated seal and impeller failures begin as suction problems.
Common Symptoms and First Checks
End suction pump symptoms should be matched to suction condition, operating point, and mechanical condition. Low flow does not automatically mean the pump is too small; it may mean the pump has lost prime, the suction line is blocked, the impeller is worn, or the rotation direction is wrong.
| Symptom | Likely Cause | First Check | Decision |
| Low flow | Clogged suction, worn impeller, wrong rotation | Suction line, impeller, rotation | Clean, correct rotation, inspect impeller |
| No flow | Lost prime, closed valve, air leak | Prime condition, suction valve | Restore prime and check suction |
| Cavitation noise | Low NPSH, high suction lift, warm liquid | Suction pressure, water level | Improve suction condition |
| Seal leakage | Dry running, vibration, seal wear | Seal chamber, suction stability | Fix cause before replacing seal |
| High current | Pump running too far right on curve | Flow, head, motor current | Reduce flow or review selection |
| Vibration | Cavitation, misalignment, bearing wear | Alignment, bearings, suction | Separate hydraulic vs mechanical cause |
What Customers Often Misjudge
End suction pump users often replace the mechanical seal first when the real problem is cavitation, dry running, or suction instability. If the pump has suction noise, unstable pressure, or repeated seal failure, check the suction condition before replacing the seal.
A repeated seal leak is often not a seal-quality problem. It may be caused by unstable suction, air pockets, vibration, dry running, pipe stress, or operation far from the selected duty point.
Split Case Pump Troubleshooting Checklist
Split case pump troubleshooting should focus on large-flow stability, bearing temperature, alignment, casing pressure, suction distribution, impeller balance, and pipe stress. Split case pumps are often used in large-flow water systems, so the cost of misdiagnosis can be high.
A split case pump should be evaluated as a pump, motor, baseplate, coupling, piping, and foundation system. Large pumps are sensitive to poor foundation, pipe load, thermal growth, alignment error, suction turbulence, and bearing lubrication problems.
Common Symptoms and First Checks
Split case pump troubleshooting should not focus only on the motor or seal. The system around the pump can create repeated bearing, seal, and vibration problems.
| Symptom | Likely Cause | First Check | Decision |
| High vibration | Misalignment, pipe stress, cavitation | Alignment, suction pipe, foundation | Correct mechanical/hydraulic stress |
| Bearing overheating | Lubrication, alignment, radial load | Bearing temperature, grease/oil | Correct lubrication or alignment |
| Low flow | Worn wear rings, blocked suction, wrong duty | Flow, casing inspection | Inspect internal clearances |
| Seal leakage | Shaft movement, vibration, pressure issue | Seal area, bearing condition | Inspect bearing and seal together |
| Uneven noise | Suction flow imbalance | Suction piping layout | Improve inlet condition |
| High power draw | Excessive flow or wrong operating point | Flow/head/current | Review pump curve |
What Customers Often Misjudge
Split case pump users often focus only on the damaged component. However, a split case pump with repeated bearing or seal problems should be checked as a full pump-piping-baseplate system.
If the discharge or suction pipe is forcing load onto the pump nozzles, the pump may show vibration, seal leakage, bearing heat, or alignment drift even when the internal components are not the original cause.
Multistage Pump Troubleshooting Checklist
Multistage pump troubleshooting should focus on high-pressure operation, stage wear, balance condition, bearing temperature, seal chamber pressure, minimum flow, and operation outside the selected duty point. Multistage pumps are often used when higher pressure is required, so internal wear or minimum-flow problems can quickly affect performance.
A multistage pump should not be allowed to operate at very low flow for long periods unless the design supports it. Low-flow or deadhead operation can increase heat, damage internal components, and shorten seal life.
Common Symptoms and First Checks
Multistage pump symptoms often involve pressure loss, seal leakage, bearing heat, or internal wear. The troubleshooting decision should compare the actual pressure and flow with the selected curve.
| Symptom | Likely Cause | First Check | Decision |
| Pressure drops | Stage wear, internal leakage | Discharge pressure, flow | Inspect stages and clearances |
| High bearing temperature | Axial thrust, lubrication, misalignment | Bearing temperature, vibration | Inspect thrust balance |
| Seal leakage | High seal chamber pressure, heat | Seal chamber, flush condition | Check seal plan and pressure |
| Pump overheats | Low flow / deadhead operation | Minimum flow, valve position | Restore minimum flow |
| High current | Excessive duty or wrong liquid | Current, flow, viscosity | Compare with selection |
| Noise | Cavitation or internal wear | Suction pressure, stage condition | Check suction and internals |
What Customers Often Misjudge
Multistage pump users often overlook minimum flow. A high-pressure multistage pump that runs at very low flow can overheat, damage internal components, and shorten seal life even if the motor appears normal.
Minimum flow protection is especially important in high-pressure applications. If the pump repeatedly overheats, loses pressure, or damages seals at low flow, the issue may be operating range rather than a single defective part.
Pipeline / Inline Pump Troubleshooting Checklist
Pipeline or inline pump troubleshooting should focus on flow restriction, trapped air, pipe stress, motor load, installation orientation, and whether the pump is correctly matched to the piping system. Inline pumps are often compact, but their installation quality strongly affects performance.
Inline pumps can suffer from trapped air, unsupported piping, poor alignment, thermal pipe stress, blocked filters, and incorrect valve positions. Because the pump is installed directly in the pipeline, the piping system often becomes part of the failure.
Common Symptoms and First Checks
Inline pump troubleshooting should start with the piping system. The pump may be mechanically healthy but unable to perform because air, blockage, or pipe stress is affecting operation.
| Symptom | Likely Cause | First Check | Decision |
| Low flow | Air pocket, clogged filter, valve restriction | Air vent, filter, valves | Remove air and restriction |
| Pump noisy | Air in line, cavitation, bearing wear | Air vent, suction pressure | Separate air vs bearing noise |
| Motor overheats | High load, poor ventilation | Current, ambient temperature | Check duty and cooling |
| Vibration | Pipe stress or poor support | Pipe support, alignment | Correct installation stress |
| Pressure fluctuation | Air, unstable demand, control issue | System pressure, sensors | Stabilize system |
| Seal leakage | Pipe stress or vibration | Pipe support and pump alignment | Correct stress before seal replacement |
What Customers Often Misjudge
Inline pump users often overlook pipe support. If the piping weight or thermal expansion transfers stress into the pump casing, seals and bearings may fail repeatedly.
A seal replacement will not solve the problem if the real cause is installation stress. The correct repair is to support the piping properly, release pipe stress, and then inspect the pump.
Booster Pump System Troubleshooting Checklist
Booster pump troubleshooting should focus on pressure tank condition, pressure sensor accuracy, VFD (Variable Frequency Drive, a motor speed control device) settings, dry-run protection, check valves, demand spikes, and whether the pump is cycling too frequently.
A booster system is not only a pump. It is a pump plus controls, pressure tank, sensor, valves, VFD, piping, and user demand. Pressure fluctuation, frequent cycling, and unstable pressure are often control or system problems rather than pump-end problems.
Common Symptoms and First Checks
Booster pump symptoms should be checked with both hydraulic and control logic in mind. A pump may be capable of producing pressure but still perform poorly because the sensor, tank, VFD, check valve, or demand pattern is wrong.
| Symptom | Likely Cause | First Check | Decision |
| Pressure fluctuates | Pressure tank or sensor problem | Tank precharge, sensor signal | Correct tank/sensor |
| Pump starts and stops often | Small tank, wrong pressure settings | Cut-in/cut-out, VFD setting | Adjust control logic |
| Low pressure | Demand exceeds capacity, clogged line | Flow demand, discharge pressure | Check system demand |
| Pump trips | Overload, dry-run, VFD alarm | Alarm code, current, water supply | Identify protection trigger |
| Noisy operation | Cavitation or air in suction | Suction line, air leaks | Fix suction stability |
| Pump runs continuously | Leak, demand, sensor failure | Downstream leakage, sensor | Find leakage/control issue |
What Customers Often Misjudge
Booster pump users often assume pressure fluctuation means the pump is weak. In many cases, the real issue is pressure tank failure, wrong sensor signal, VFD setting, downstream leakage, or demand above design.
If the booster system loses stable pressure or the pump cycles frequently, this booster pump pressure instability guide can help buyers check pressure tanks, sensors, VFD control, and demand changes.
Submersible Pump Troubleshooting Checklist
Submersible pump troubleshooting should focus on water level, motor cooling, cable voltage drop, blockage, float switch, dry-run protection, insulation condition, and whether the pump is suitable for the liquid. A submersible pump works inside the liquid, so the surrounding liquid affects cooling, performance, and safety.
Submersible pumps should not be diagnosed only from the surface control box. Water level, cable condition, motor insulation, blockage, and float switch movement are often the real clues.
Common Symptoms and First Checks
Submersible pump symptoms should be checked with both electrical and hydraulic logic. A pump that stops after running may be overheating due to low water level, while a pump that hums but does not pump may have a blocked impeller or electrical component problem.
| Symptom | Likely Cause | First Check | Decision |
| Pump does not start | Power, float switch, cable, motor | Power supply, float, cable | Test electrical path |
| Pump stops after running | Overheat, low water level, overload | Water level, current | Restore cooling/submergence |
| Low flow | Clogged inlet, worn impeller | Intake, impeller | Clean or inspect |
| Pump trips breaker | Motor fault, cable damage, overload | Insulation, current | Stop and test motor/cable |
| Pump hums but no flow | Blocked impeller or failed capacitor | Impeller, capacitor | Clear blockage/test parts |
| Frequent dry-run alarm | Water level too low or sensor issue | Level sensor, float | Adjust protection |
What Customers Often Misjudge
Submersible pump users often forget that the motor depends on liquid for cooling. If the water level drops or the pump is partially exposed, the motor may overheat even when the pump still seems to be running.
If the submersible pump stops suddenly, this submersible pump troubleshooting guide can help users check water level, motor cooling, float switch, blockage, cable condition, and dry-run protection.
Sewage Pump Troubleshooting Checklist
Sewage pump troubleshooting should focus on clogging, float switch operation, impeller blockage, solids handling, check valve function, basin level control, and whether the pump is suitable for the wastewater load. Sewage pump problems often come from the pumped material and the control system.
Sewage pumps handle solids, fibers, wastewater, and unpredictable debris. A pump that fails repeatedly may not be defective; it may be exposed to solids that exceed its handling capacity or a basin control condition that causes short cycling.
Common Symptoms and First Checks
Sewage pump symptoms should be checked with the basin, float switch, check valve, impeller, and discharge line together. Overflow does not always mean the pump is undersized; it may mean the float switch failed or the discharge line is blocked.
| Symptom | Likely Cause | First Check | Decision |
| Pump does not start | Float switch, control panel, power | Float movement, panel alarm | Repair control issue |
| Pump runs but no discharge | Blocked impeller or pipe | Impeller, discharge line | Clear blockage |
| Pump cycles too often | Basin size, float setting, backflow | Float levels, check valve | Adjust level control |
| Strong vibration | Debris, worn impeller, imbalance | Impeller and solids | Clean and inspect |
| Bad odor / overflow | Pump not removing wastewater | Basin level, pump operation | Restore pumping quickly |
| Motor overload | Clogging, wrong pump type | Current, solids type | Use proper solids-handling pump |
What Customers Often Misjudge
Sewage pump users often replace the pump when the real problem is float switch failure, check valve backflow, clogged discharge piping, or solids that exceed the pump’s handling capacity.
If clogging repeats, the correct decision may be to improve screening, change the impeller type, adjust basin control, or select a pump designed for larger solids.
Slurry Pump Troubleshooting Checklist
Slurry pump troubleshooting should focus on abrasion, solids concentration, impeller wear, liner wear, velocity, suction condition, and whether the pump material and hydraulic design match the slurry. Slurry service is different from clean-water service because wear is part of the operating reality.
A slurry pump may lose performance because the impeller and liner are worn, solids concentration changed, velocity is wrong, or the pump material is unsuitable for the abrasive load. Treating slurry wear like ordinary pump failure often leads to repeated replacement.
Common Symptoms and First Checks
Slurry pump symptoms should be interpreted through wear and solids behavior. A drop in flow may mean hydraulic wear, not only blockage. High current may mean increased slurry density or viscosity.
| Symptom | Likely Cause | First Check | Decision |
| Flow drops | Impeller/liner wear or blockage | Impeller, liner, solids | Inspect wear parts |
| High vibration | Solids imbalance, worn parts | Impeller wear, bearing condition | Replace worn components |
| High power | Solids concentration or viscosity change | Slurry density, current | Compare with selection |
| Seal failure | Abrasive solids entering seal | Seal flush, slurry condition | Improve seal protection |
| Rapid wear | Wrong material or high velocity | Material, velocity, particle size | Reselect material/design |
| Frequent blockage | Oversized solids or low velocity | Particle size, pipe velocity | Adjust system design |
What Customers Often Misjudge
Slurry pump users often treat wear as ordinary pump failure. In slurry service, wear is expected, but rapid wear usually means material, velocity, particle size, or solids concentration does not match the pump design.
The correct decision is not always to buy a harder material. The better decision may involve adjusting velocity, impeller type, liner material, seal protection, or slurry concentration control.
Chemical Pump Troubleshooting Checklist
Chemical pump troubleshooting should focus on liquid compatibility, vapor pressure, seal material, corrosion, leakage risk, temperature, viscosity, and safety procedures before any disassembly. Chemical pump failures require more caution because the liquid may be hazardous, corrosive, toxic, or temperature-sensitive.
A chemical pump should not be opened or repaired until the system is isolated, depressurized, flushed, and made safe according to site procedure. Material compatibility and seal compatibility must be checked before replacing parts.
Common Symptoms and First Checks
Chemical pump symptoms should be checked against the liquid data. A seal leak may be caused by chemical attack, vapor pressure, temperature, wrong elastomer, dry running, or corrosion.
| Symptom | Likely Cause | First Check | Decision |
| Leakage | Seal incompatibility, corrosion, pressure | Seal material, liquid data | Stop and follow safety procedure |
| Corrosion | Wrong material or chemical change | pH, concentration, temperature | Review material compatibility |
| Low flow | Vapor lock, viscosity, blockage | Liquid temperature, suction | Check vapor pressure and viscosity |
| Seal failure | Chemical attack or dry running | Seal faces, elastomer material | Match seal to chemical |
| Pump noise | Cavitation or vapor pressure issue | Suction pressure, temperature | Improve suction margin |
| Motor overload | High viscosity or specific gravity | Current, liquid properties | Compare with selection |
What Customers Often Misjudge
Chemical pump users should not treat leakage as a normal maintenance issue until liquid safety and compatibility are confirmed. A wrong material or seal elastomer can fail quickly even if the pump is mechanically assembled correctly.
If the pump corrodes, leaks, or loses material quickly, this pump corrosion troubleshooting guide can help engineers check liquid chemistry, material grade, chloride, pH, temperature, and corrosion pattern before replacing the pump.
Diesel-Driven Pump Troubleshooting Checklist
Diesel-driven pump troubleshooting should separate engine problems from pump-end problems. A diesel pump may fail because the engine cannot start, the cooling system overheats, the fuel system is restricted, the battery is weak, or the pump end has suction or hydraulic problems.
A diesel-driven pump is a package system. Engine condition, fuel, air intake, battery, cooling, coupling, alignment, priming, suction pipe, and pump curve all matter. If the engine runs but the pump has no flow, the pump end should be checked. If the engine cannot start, the engine system should be checked first.
Common Symptoms and First Checks
Diesel pump symptoms should be separated into engine-side and pump-side causes. This prevents users from replacing pump parts when the real issue is fuel, battery, air filter, cooling, or engine load.
| Symptom | Likely Cause | First Check | Decision |
| Engine hard to start | Battery, fuel, air, compression | Battery, fuel line, filters | Fix engine starting issue |
| Engine runs but no flow | Lost prime, suction blockage | Prime, suction pipe | Restore pump suction |
| Engine overheats | Cooling system or overload | Radiator, coolant, load | Fix cooling/load issue |
| Pump vibrates | Misalignment, cavitation, foundation | Coupling, suction, base | Correct alignment/suction |
| Black smoke | Overload or fuel issue | Load, air filter, fuel | Reduce load/check engine |
| Low pressure | Pump wear or suction problem | Flow, pressure, impeller | Compare with pump curve |
What Customers Often Misjudge
Diesel pump users often assume every failure is a pump-end problem. In reality, engine cooling, battery condition, fuel supply, air filter restriction, and coupling alignment must be checked together with suction and discharge conditions.
A diesel pump should be diagnosed as an engine-pump package. If the engine cannot reach stable speed, pump performance cannot be judged fairly.
Symptom-Based Pump Troubleshooting Table Across Pump Types
A symptom-based pump troubleshooting table helps users compare similar symptoms across different pump designs. The same symptom can point to very different root causes depending on the pump type.
This table should be used after the user identifies the pump type. It is not a replacement for pump-specific diagnosis, but it is useful for fast decision-making when the user needs to decide where to inspect first.
| Symptom | Centrifugal Pump | Submersible Pump | Booster System | Slurry / Sewage Pump |
| No flow | Lost prime, closed valve | Blocked intake, low water | Sensor/control issue | Impeller blockage |
| Low flow | Cavitation, worn impeller | Clogged inlet | Demand exceeds capacity | Wear or blockage |
| High current | Too much flow, wrong duty | Blockage, motor overload | VFD setting/load | High solids |
| Vibration | Cavitation, misalignment | Debris, bearing issue | Pressure fluctuation | Solids imbalance |
| Seal leakage | Dry running, vibration | Usually motor seal/cable issue | Cycling/vibration | Abrasive wear |
| Repeated trip | Overload/electrical | Motor cooling/cable | VFD/control alarm | Solids overload |
The table shows why a generic pump checklist is risky. A repeated trip in a booster system may be a VFD control issue, while a repeated trip in a submersible pump may be low water level, insulation failure, or motor cooling loss.
How to Decide Whether to Repair, Adjust Operation, or Reselect the Pump
Pump troubleshooting should end with a decision, not only a diagnosis. Customers need to know whether the problem can be repaired, whether operation should be adjusted, or whether the pump should be reselected.
A pump should be repaired when the issue is local and correctable. Operation should be adjusted when the pump is being used outside its safe range. Reselection should be considered when repeated failure shows that the pump does not match the real duty.
Repair Is Usually Enough When
Repair is usually enough when the root cause is a clogged strainer, damaged seal, worn bearing, failed float switch, dirty intake, loose terminal, failed pressure sensor, blocked impeller, or maintenance-related issue that can be corrected without changing the pump’s duty.
The repair should still address the cause, not only the damaged part. For example, a seal can be replaced, but the suction instability that damaged it must also be corrected.
Operation Should Be Adjusted When
Operation should be adjusted when the pump is running dry, operating far from BEP, cycling too frequently, running below minimum flow, running with unstable suction, or being forced into long duty cycles that were not considered during selection.
Operational adjustment may include reducing flow, adjusting VFD settings, changing pressure setpoints, improving suction level, cleaning strainers more often, correcting minimum-flow protection, or changing operating schedule.
Reselection May Be Needed When
Reselection may be needed when the actual flow, head, liquid, solids, temperature, viscosity, suction condition, or runtime is different from the original selection. If the same failure repeats after repair, the pump may not match the real system.
| Decision | When It Makes Sense | What to Confirm First |
| Repair | Single component failure, correct duty | Root cause is local and correctable |
| Adjust operation | Pump is outside safe operating range | Pump can work if conditions improve |
| Upgrade component | Seal, material, bearing, or motor margin is insufficient | System condition is otherwise correct |
| Reselect pump | Repeated failure or wrong duty | Actual duty differs from original selection |
| Redesign system | Suction, piping, solids, or controls are wrong | Pump failure is caused by system layout |
A good troubleshooting result is not simply “replace the part.” A good result explains whether the part failed because of wear, wrong operation, poor installation, wrong liquid, control instability, or wrong pump selection.
Common Troubleshooting Mistakes That Cause Repeat Pump Failure
Many pump failures repeat because the first repair only replaces the damaged part without removing the cause. A complete troubleshooting checklist should identify the operating trigger, not only the failed component.
These mistakes are common because the failed part is visible, while the root cause is often hidden in suction conditions, control logic, liquid properties, pump curve mismatch, pipe stress, or electrical supply.
| Mistake | Why It Causes Repeat Failure | Better Decision |
| Replacing seal without checking dry-run | New seal fails again | Check suction and seal chamber first |
| Replacing motor without checking current | Motor may burn again | Measure load and voltage |
| Ignoring suction condition | Cavitation continues | Check NPSH, water level, suction pipe |
| Treating all pumps the same | Wrong checklist applied | Identify pump type first |
| Ignoring pump curve | Wrong duty remains | Compare actual flow/head with curve |
| Ignoring liquid properties | Material/seal mismatch | Check liquid, temperature, solids |
| Restarting after repeated trips | Damage escalates | Stop and collect data |
The most expensive mistake is replacing the same component multiple times while the real cause remains unchanged. If a seal, bearing, motor, impeller, cable, or VFD trips repeatedly, the system condition must be reviewed.
Supplier Data Checklist for Pump Troubleshooting
A supplier can diagnose pump problems faster when customers provide complete operating data. Saying “the pump does not work” is not enough for accurate troubleshooting.
The best supplier communication includes the pump model, application, flow, head, suction condition, electrical readings, liquid data, symptom description, runtime before failure, and photos or videos. This helps separate pump quality, installation, operation, maintenance, and selection problems.
| Data Type | What to Provide | Why It Matters |
| Pump type and model | Exact pump identification | Confirms design and curve |
| Application | Water, sewage, slurry, chemical, booster | Defines failure context |
| Flow and head | Actual duty point | Checks selection match |
| Suction condition | Water level, suction pressure, suction pipe | Finds cavitation/dry-run |
| Discharge pressure | System resistance | Finds blockage or wrong duty |
| Motor current and voltage | Electrical load | Finds overload or supply issue |
| Liquid details | Temperature, viscosity, solids, pH | Checks compatibility |
| Failure symptom | Noise, trip, leakage, low flow | Directs diagnosis |
| Runtime before failure | Heat/duty issue | Finds repeat pattern |
| Photos/videos | Visual and sound evidence | Supports remote diagnosis |
A short video can be very useful if it shows the pressure gauge, sound, vibration, leakage point, control panel alarm, and pump nameplate. Photos should include both close-up details and wider installation context.
FAQ About Complete Pump Troubleshooting Checklist
Pump troubleshooting questions usually come from users who need to decide whether they can fix the issue on site, whether the pump must be stopped, or whether they need supplier support. These answers focus on practical decision-making rather than generic theory.
What is the first thing to check when a pump fails?
The first thing to check is whether the pump can safely keep running. If there is dry running, heavy vibration, repeated trips, burning smell, severe leakage, or loud cavitation noise, stop the pump first.
After safety is confirmed, identify the pump type and record the main symptom. Then collect current, voltage, suction condition, discharge pressure, flow, liquid condition, noise, vibration, and runtime before failure.
Why should pump troubleshooting be organized by pump type?
Pump troubleshooting should be organized by pump type because the same symptom can have different causes. Low flow in a centrifugal pump may mean cavitation, while low flow in a submersible pump may mean low water level or blockage.
Pressure fluctuation in a booster system may be a pressure tank or sensor issue, not a pump-end issue. Rapid wear in a slurry pump may be normal abrasive service, but the same wear pattern in a clean-water pump would be abnormal.
Why does a pump run but produce no flow?
A pump may run with no flow because it has lost prime, the suction valve is closed, the intake is blocked, the impeller is damaged, the rotation direction is wrong, or the control system is not opening the correct path.
The correct check depends on pump type. For end suction pumps, check priming and suction. For submersible pumps, check intake blockage and water level. For booster systems, check sensor and control logic. For sewage pumps, check impeller blockage and discharge line blockage.
Why does a pump keep tripping?
A pump may keep tripping because of motor overload, low voltage, phase imbalance, blocked impeller, dry running, VFD alarm, overheating, excessive flow, high solids, or wrong pump selection.
Repeated restart should be avoided until current, voltage, and mechanical load are checked. If the same trip repeats, collect data and stop guessing.
Should I replace the pump or repair it?
You should repair the pump if the failure is local and correctable, such as a damaged seal, clogged strainer, worn bearing, failed sensor, or blocked impeller. You should consider reselection if the same failure repeats after repair.
Reselection is more likely when the actual flow, head, liquid, solids, suction condition, temperature, viscosity, or runtime does not match the original pump selection.
What data should I send to the pump supplier?
You should send pump type, model, application, flow, head, suction condition, discharge pressure, motor current, voltage, liquid details, failure symptom, runtime before failure, and photos or videos.
Complete data helps the supplier separate pump quality, installation, operation, maintenance, and selection problems. It also reduces back-and-forth communication and helps the supplier recommend the correct repair or replacement path.
Why does the same pump problem keep coming back?
The same pump problem usually keeps coming back because the damaged part was replaced without correcting the root cause. A new seal fails again if dry running continues. A new motor may burn again if current and voltage are not checked. A new impeller may wear again if slurry conditions are unchanged.
Repeated failure means the troubleshooting process should move from component replacement to system diagnosis.
Can one checklist troubleshoot every pump?
One checklist can help collect basic data, but it cannot diagnose every pump correctly. Pump type matters because each design has different failure patterns.
A good checklist should first collect universal data, then switch to pump-specific checks. That is why this guide separates centrifugal pumps, split case pumps, multistage pumps, inline pumps, booster systems, submersible pumps, sewage pumps, slurry pumps, chemical pumps, and diesel-driven pumps.
Conclusion
A complete pump troubleshooting checklist should help users identify the pump type first, then check symptoms, operating data, electrical conditions, hydraulic conditions, mechanical components, control logic, liquid conditions, installation quality, and selection match before replacing parts.
The correct pump troubleshooting decision is not only to find the failed part, but to find why that part failed. A pump seal, bearing, motor, impeller, cable, VFD, or pressure sensor may be the visible failure, but the real cause may be suction instability, dry running, cavitation, blockage, pipe stress, electrical supply, liquid properties, control settings, or wrong selection.
Customers should not troubleshoot all pumps with one generic method. An end suction centrifugal pump needs suction and cavitation checks. A booster system needs tank, sensor, and VFD checks. A submersible pump needs water level, cooling, cable, and blockage checks. A slurry pump needs wear and solids checks. A chemical pump needs compatibility and safety checks. A diesel-driven pump needs engine and pump-end checks together.
For engineers, maintenance teams, buyers, and operators, the practical rule is simple: identify the pump type, confirm the symptom, collect real operating data, check the most likely failure points for that pump type, and then decide whether to repair, adjust operation, upgrade components, redesign the system, or reselect the pump. This approach reduces repeat failures, avoids unnecessary replacement, and helps the customer make a safer maintenance or procurement decision.
Get A Quote

Get A Quote
0 Comments