
Why Is There Air Inside Your Pump? Causes, Troubleshooting, and Prevention
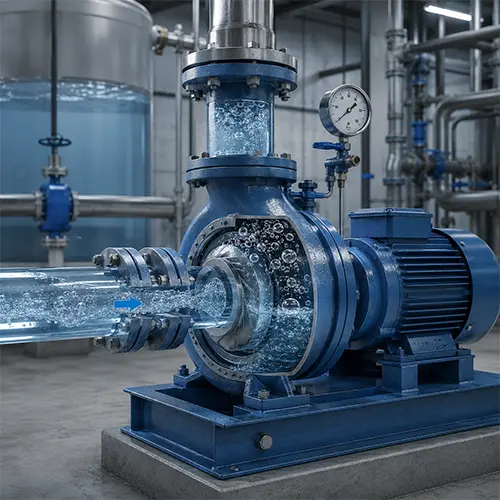
Air inside a pump usually means the pump system is not fully filled with liquid, or air is entering through the suction side, tank, piping, valves, seals, or operating condition. For maintenance teams, engineers, facility managers, irrigation users, and B2B pump buyers, this problem often appears as noisy operation, unstable pressure, reduced flow, vibration, loss of prime, visible bubbles in the discharge line, or a pump that runs but does not deliver enough water.
Air inside a pump is not always caused by pump body failure. In many field cases, the pump itself is only reacting to a system problem. The real cause may be suction-side leakage, incomplete priming, low tank level, vortex formation, a leaking foot valve, a leaking check valve, pipe high points, poor venting, clogged suction strainers, or cavitation caused by poor inlet conditions. If the root cause is not found, the same air problem can return even after venting, replacing seals, or installing a new pump.
The correct response is to diagnose how air enters, where it collects, and why it returns. A small air pocket after maintenance may only require proper venting. Repeated air bubbles, pressure fluctuation, seal leakage, cavitation noise, or flow loss usually means the suction system, pipe layout, valve condition, or operating point must be corrected. This guide explains why there is air inside your pump, what to check first, when to stop the pump, how to separate air entrainment from cavitation, and when the right solution is venting, sealing, valve repair, piping redesign, or pump re-selection.
Scope of This Guide: Applicable Pump Types and Operating Conditions
This guide is mainly written for water pump systems where air enters the pump or remains trapped inside the pump casing, suction line, discharge line, or system high points. It is most suitable for clean-water and low-solids pump applications, especially centrifugal pumps, booster systems, irrigation pumps, transfer pumps, HVAC circulation pumps, and general industrial water systems.
This guide should not be treated as a universal troubleshooting method for every pump type. Air problems in a clean-water centrifugal pump are not the same as gas handling in a chemical process pump, trapped gas in a sewage system, or vapor formation in a hot water pump. The inspection order must match the pump category, liquid properties, suction condition, operating temperature, pressure level, and safety risk.
| Pump Type / Application | Can Use This Guide? | What Must Be Adjusted |
| Centrifugal clean-water pump | Yes | Focus on priming, suction leaks, inlet pressure, and air pockets |
| Booster pump system | Yes | Add pressure tank, check valve, suction supply, and pressure control checks |
| Irrigation pump | Yes | Add suction lift, foot valve, strainer, tank level, and long-pipe air pocket checks |
| End suction pump | Yes | Focus on suction pipe layout, priming, flange sealing, and NPSH margin |
| Pipeline / inline pump | Yes | Focus on pipe high points, venting, inlet pressure, and system air release |
| Multistage clean-water pump | Yes | Focus on inlet pressure, venting, cavitation risk, and stable suction supply |
| HVAC circulation pump | Yes | Focus on trapped air, expansion tank, system filling, and air separators |
| Self-priming pump | Yes, with adjustment | Check priming chamber, suction lift, foot valve, and air separation time |
| Submersible pump | Partially | Focus more on liquid level, vortex formation, discharge air lock, and safe handling |
| Sewage pump | Partially | Add clogging, pit turbulence, check valve, and trapped gas checks |
| Slurry pump | Partially | Air may mix with solids; also check wear, density, and pipe settlement |
| Chemical pump | Partially | Must check seal system, vapor pressure, compatibility, and safety procedures |
| Hot water pump | Partially | Vapor formation and NPSH margin become more important |
| Fire pump | Limited | Must follow fire protection standards and approved testing procedures |
This guide is not suitable for direct use in fire pump systems under code requirements, hazardous chemical pumps, explosive atmosphere pump systems, high-temperature process pumps, vacuum pump systems, pumps handling toxic or volatile liquids, or high-pressure boiler feed systems. Those applications require qualified engineers and site-specific safety procedures.
Why Air Gets Inside a Pump
Air gets inside a pump when the pump casing, suction line, or liquid path is not fully filled with liquid, or when air enters through leaks, low liquid level, vortex formation, poor priming, pipe high points, faulty valves, or unstable suction conditions.
Air inside a pump is usually caused by suction-side leakage, incomplete priming, low tank level, vortex formation, clogged suction strainers, damaged gaskets, loose flanges, leaking foot valves, trapped air in high piping, cavitation, or poor system design. The first diagnostic step is to determine whether the air appears before startup, immediately after startup, after maintenance, during high flow demand, after shutdown, when the tank level is low, or after long operation.
The fastest practical rule is this: if air appears after maintenance, check priming and venting first. If air returns after every shutdown, check the foot valve, check valve, and suction pipe sealing. If air appears only at low tank level, check vortex formation and inlet submergence. If air appears with gravel-like noise, vibration, and reduced flow, check cavitation and suction pressure.
Quick Answer: Why Is There Air Inside Your Pump?
There is air inside your pump because air is entering the suction side, trapped in the pump casing, released from the liquid, or pulled into the system by poor inlet conditions. The fastest diagnosis is to check priming, suction pipe joints, tank level, inlet vortex, foot valve, check valve, air release points, suction pressure, and whether the pump loses prime after stopping.
A pump is designed to move liquid, not air. When too much air enters the pump, the impeller cannot transfer energy to the liquid efficiently. This can reduce flow, make pressure unstable, increase vibration, damage the mechanical seal, and in severe cases cause dry running or cavitation damage. The key is not only to remove air, but to find why the air entered in the first place.
| Field Symptom | Likely Cause | What to Check First | Recommended Action |
| Pump loses prime after stopping | Foot valve leak, suction leak, check valve failure | Foot valve, suction pipe, check valve | Repair valve or seal suction line |
| Air bubbles in discharge | Suction-side air leak, vortex, low liquid level | Tank level, suction joints, inlet position | Seal leaks and adjust liquid level |
| Pump makes gravel-like noise | Cavitation or air entrainment | Suction pressure, NPSH margin, strainer | Improve suction condition |
| Flow drops suddenly | Air lock, suction restriction, trapped air | Pump casing, vent valve, suction line | Vent system and inspect suction |
| Pump runs but no water | Not primed, air lock, blocked suction | Priming condition, foot valve, suction pipe | Re-prime and clear blockage |
| Pressure fluctuates | Air pockets or unstable suction supply | High pipe points, air release valve, tank | Install or repair air release points |
| Problem appears after maintenance | Incomplete priming or loose flange | Gaskets, flange bolts, venting process | Re-seal and vent correctly |
This table should be used before replacing pump parts. Air inside a pump is often a system symptom, not a pump-only failure.
Failure Pattern: Should You Stop the Pump or Keep Troubleshooting?
Air inside a pump should first be judged by risk. Some air problems can be corrected by safe venting and monitoring, while others require immediate shutdown because continued operation can damage the pump or create safety problems.
The decision depends on discharge flow, noise, vibration, seal condition, casing temperature, motor current, and the type of liquid. A pump moving clean water under stable conditions has lower risk than a pump handling hot liquid, chemicals, or critical process water.
| Failure Pattern | First Check | Can Continue Running? | Next Action |
| Pump runs but no water comes out | Priming, air lock, suction blockage | No | Stop and re-prime after checking suction path |
| Air bubbles appear in discharge | Suction leak, vortex, low liquid level | Limited | Check tank level, suction joints, and inlet position |
| Gravel-like noise appears | Cavitation or severe air entrainment | No if severe | Check suction pressure, strainer, and NPSH margin |
| Air returns after every venting | Foot valve leak, pipe high point, suction leak | Limited | Inspect valves, suction line, and air release points |
| Mechanical seal starts leaking | Dry running, cavitation, suction instability | No | Stop and inspect the root hydraulic cause |
| Bearing or casing temperature rises | Air-related vibration or poor cooling | No | Stop and check flow, suction, and mechanical condition |
| Small air after maintenance only | Incomplete venting | Yes, if stable | Vent carefully and monitor pressure, current, and noise |
This decision table helps customers avoid two common mistakes: shutting down too late when damage is already developing, or replacing a pump too early when the real problem is a suction leak or trapped air pocket.
Is Air Inside the Pump Dangerous?
Air inside a pump can be harmless if it is a small trapped pocket that can be vented quickly, but it becomes dangerous when it causes dry running, cavitation, loss of prime, vibration, overheating, seal damage, or unstable flow. The more often air returns, the more likely the problem is a system defect rather than a one-time operating issue.
The risk is higher when the pump runs without discharge flow, handles hot water, operates near the suction limit, or serves a critical process. Air can reduce the liquid contact needed for hydraulic performance and cooling. It can also create unstable forces inside the casing, which increases mechanical stress.
When Air Inside the Pump Requires Immediate Shutdown
Air inside the pump requires immediate shutdown when the pump runs with no discharge water, the mechanical seal begins leaking, the pump casing overheats, severe vibration appears, gravel-like cavitation noise appears, motor current becomes abnormal, the pump loses prime repeatedly, flow drops to near zero, bearing temperature rises, or the pump handles chemical, hot, or hazardous liquid.
In these cases, continuing operation can turn a simple air problem into a seal failure, bearing failure, impeller damage, or motor overload. If there is no reliable flow through the pump, the safest decision is to stop the pump and diagnose the cause.
When Short-Term Venting and Monitoring May Be Enough
Short-term venting and monitoring may be enough when a small amount of air remains after maintenance, pump pressure stabilizes after venting, there is no abnormal noise or vibration, motor current remains normal, flow returns to normal quickly, and no seal leakage appears.
Even in this lower-risk case, the operator should record the pressure, flow, motor current, and whether air returns after shutdown. If the same air problem repeats, the issue should be treated as a root-cause problem, not a normal startup event.
What Damage Can Air Cause If Ignored?
Air inside a pump can cause mechanical seal dry running, impeller cavitation damage, bearing vibration stress, reduced flow, unstable pressure, motor overload or underload, loss of cooling in some systems, pipe vibration, water hammer, and higher energy cost due to poor efficiency.
If air inside the pump causes reduced flow, unstable pressure, or higher energy consumption, this pump efficiency loss guide can help maintenance teams judge whether the pump is losing performance because of suction instability, cavitation, or operation away from the correct duty point.
Where Does the Air Enter the Pump System?
Air usually enters the pump system from the suction side, not the discharge side. The most common entry points are suction pipe joints, flange gaskets, mechanical seal areas under vacuum, foot valves, low tank levels, vortex formation, and poorly vented pipe high points.
This is important because many users look for water leaks and assume the suction line is sealed if they do not see water escaping. In suction piping, the pressure may be below atmospheric pressure. That means air can be pulled inward even when liquid does not visibly leak outward.
Suction Pipe Leaks
Suction pipe leaks are one of the most common reasons air enters a pump. Typical leak locations include threaded joints, flange gaskets, flexible hose connections, suction valve stems, union joints, pump inlet gaskets, old pipes, cracked pipes, or poorly sealed fittings.
A suction leak can cause air bubbles in the discharge, unstable pressure, reduced flow, loss of prime, and noise inside the pump. The leak may be small, but because it is located on the suction side, it can still pull enough air into the system to disturb pump performance.
Low Liquid Level and Vortex Formation
Low liquid level can allow air to enter through vortex formation. A vortex is a swirling funnel that forms above the inlet when the liquid level is too low, the inlet velocity is too high, or the suction opening is poorly positioned.
This is common in water tanks, sumps, cooling water basins, irrigation reservoirs, and open suction tanks. A pump may work normally when the tank is full, but pull air when the level drops. If the problem only appears at low level or high demand, vortex formation should be checked before blaming the pump.
Foot Valve or Check Valve Leakage
A leaking foot valve or check valve can allow liquid to drain back after the pump stops. When this happens, the suction line loses liquid, air enters the line, and the pump may fail to prime during the next startup.
This is common in suction lift systems, irrigation pumps, transfer pumps, and systems where the pump must hold liquid in the suction pipe after shutdown. If the pump always needs to be re-primed after stopping, the foot valve, check valve, and suction line sealing should be inspected.
High Points in the Piping System
High points in the piping system can trap air and release it into the pump during operation. Long pipelines, inverted U-shaped sections, poor pipe slopes, and missing air release valves can all create air pockets.
Air pockets can cause intermittent flow, gurgling sounds, pressure fluctuation, and repeated air discharge. If the pump works after venting but the problem returns, the piping layout should be reviewed.
Priming Problems: Why the Pump Starts with Air Inside
A pump starts with air inside when the pump casing and suction line are not fully filled with liquid before startup. This is common in centrifugal pumps, irrigation pumps, transfer pumps, and systems with suction lift.
Centrifugal pumps generally cannot pump air effectively. They need liquid inside the casing to create pressure and flow. If the pump starts with air trapped inside, the impeller may spin but fail to move water properly. This can make the pump sound hollow, produce no flow, and overheat if the condition continues.
What Priming Means in Simple Terms
Priming means filling the pump casing and suction line with liquid so the impeller can transfer energy to the liquid. A properly primed pump has air removed from the casing and suction path before startup.
In simple terms, priming gives the pump something to push. Without enough liquid, the impeller mostly spins in air or air-liquid mixture. That is why a pump can run but produce little or no water when it is not primed.
Signs the Pump Is Not Properly Primed
Signs of poor priming include the pump running but no water coming out, pressure failing to build, intermittent flow, a hollow sound inside the casing, visible air bubbles in the discharge, repeated loss of prime after stopping, or the need to refill the pump before each startup.
Poor priming may happen after maintenance, after the suction line is opened, after long idle periods, or after a foot valve begins leaking. If the pump must be re-primed frequently, the problem is usually not the priming process itself but the system’s inability to hold liquid.
Why Re-Priming Alone May Not Solve the Problem
Re-priming alone may not solve the problem if the real cause is a suction leak, foot valve leakage, check valve failure, suction pipe high point, low tank level, excessive suction lift, or incorrect pump installation height.
If a pump works briefly after priming but later loses prime again, the system should be inspected for leakage or backflow. Repeated manual priming is not a normal long-term solution.
Suction-Side Air Leaks: The Most Common Root Cause
Suction-side air leaks are one of the most common reasons air enters a pump. Because the suction line may operate below atmospheric pressure, air can be pulled inward even when water does not visibly leak outward.
This is one of the most important field lessons for customers. A pipe joint that looks dry can still be the source of air. The absence of visible water leakage does not prove that the suction pipe is airtight.
Why Suction Leaks Are Hard to Find
Suction leaks are hard to find because they may only appear during pump operation. When the pump is stopped, there may be no visible sign. When the pump runs, the suction side pulls air inward instead of pushing water outward.
Small leaks can also appear intermittently. A gasket may seal at one temperature but leak after vibration. A flexible hose may leak only when bent. A valve stem may leak only under vacuum. For this reason, suction leak diagnosis often requires careful observation and testing.
Common Suction Leak Locations
Suction leaks usually appear at sealing points, aging components, or areas exposed to vibration. The table below shows common locations and practical confirmation methods.
| Leak Location | Field Symptom | How to Confirm | Best Action |
| Flange gasket | Air bubbles, unstable flow | Inspect gasket and bolt tightness | Replace gasket and tighten evenly |
| Threaded joint | Loss of prime | Apply safe leak test method | Re-seal joint |
| Flexible hose | Intermittent air entry | Bend and inspect hose surface | Replace cracked hose |
| Valve stem | Air enters under suction | Check around valve packing | Repair or replace valve |
| Pump inlet gasket | Noise and air bubbles | Inspect during shutdown | Replace gasket |
| Old suction pipe | Repeated air problem | Pressure or vacuum test | Replace pipe section |
Safe Ways to Check for Suction Air Leaks
Safe ways to check for suction air leaks include visual inspection, soap solution on accessible suction joints, vacuum testing, using a temporary transparent suction section, listening for air hiss, and observing whether bubbles disappear after sealing suspected joints.
Industrial systems, chemical systems, hot liquids, and hazardous liquids should not be tested casually. In those cases, leak detection must follow site safety procedures.
Cause → Symptom → Test → Decision Table
A good troubleshooting process should connect each possible cause to a field symptom, a test method, and a decision. This helps customers avoid replacing pump parts when the real problem is suction piping, liquid level, or valve leakage.
This table is especially useful for internal maintenance reports because it turns a vague symptom such as “pump has air” into a structured diagnosis.
| Cause | Symptom | Test | Decision |
| Suction leak | Air bubbles, loss of prime, unstable flow | Soap test, vacuum test, inspect joints | Re-seal suction joint or replace gasket |
| Low tank level | Air appears at high flow or low level | Observe inlet and vortex formation | Raise operating level or reposition inlet |
| Foot valve leakage | Pump loses prime after stopping | Check backflow and suction line liquid retention | Replace or repair foot valve |
| Check valve failure | Backflow, water hammer, loss of prime | Inspect valve operation after shutdown | Repair or replace check valve |
| Pipe high point | Air returns after venting | Inspect pipe slope and high sections | Add air release valve or correct pipe slope |
| Incomplete priming | Pump runs but no water after startup | Open vent and confirm casing is full | Re-prime and correct startup process |
| Clogged strainer | Cavitation-like noise, low flow | Inspect suction strainer and inlet pressure | Clean strainer and restore suction flow |
| Cavitation | Gravel-like noise, vibration, impeller pitting | Check suction pressure, NPSH, liquid temperature | Improve suction condition |
| Pump installed too high | Repeated priming failure | Check suction lift and installation height | Lower pump or redesign suction line |
| Wrong pump/system design | Repeated air problem after repairs | Compare system layout and duty point | Redesign piping or reselect pump |
This table shows why air inside a pump is usually a system diagnosis, not only a pump inspection.
Cavitation vs Air Entrapment: Do Not Confuse Them
Cavitation and air inside the pump can feel similar because both may cause noise, vibration, unstable pressure, and reduced flow. However, cavitation is caused by vapor bubble formation and collapse, while air entrainment is caused by external air entering or trapped gas moving through the pump.
Confusing these two problems can lead to wrong repairs. Venting may help remove trapped air, but it will not solve cavitation if the pump lacks enough suction pressure or NPSH margin. Replacing a seal may stop leakage temporarily, but the seal may fail again if cavitation or air entrainment continues.
What Is Cavitation?
Cavitation happens when local pressure inside the pump drops below the liquid’s vapor pressure. Vapor bubbles form and then collapse when they reach a higher-pressure area.
This collapse can damage the impeller surface, create noise, increase vibration, reduce flow, and damage seals and bearings over time. Cavitation is often related to poor suction conditions, high liquid temperature, clogged suction strainers, excessive suction lift, or operating far from the correct duty point.
What Is Air Entrapment?
Air entrapment happens when external air enters the system or trapped air remains inside the pump or piping. The air may come from suction leaks, low tank level, vortex formation, incomplete priming, or pipe high points.
Air entrapment can often improve after venting, sealing suction leaks, correcting liquid level, or adding air release valves. However, if the air keeps returning, the source must be found.
How to Tell the Difference
Cavitation and air entrainment can overlap, but field symptoms can help separate them.
| Symptom | More Likely Air Entrapment | More Likely Cavitation |
| Air bubbles visible in discharge | Yes | Not always |
| Happens after maintenance | Common | Possible |
| Improves after venting | Often | Usually not enough |
| Gravel-like noise under high flow | Possible | Very common |
| Impeller pitting over time | Less direct | Common |
| Low suction pressure / high temperature | Possible | Strong indicator |
| Repeated seal damage | Possible | Common |
If air problems appear together with sudden low flow, this pump flow drop troubleshooting guide can help operators compare suction restriction, air entrainment, cavitation, and discharge blockage before replacing pump parts.
Air Lock in Pump Systems
Air lock happens when trapped air blocks or restricts liquid movement through the pump or piping. The pump may run, but the liquid cannot move normally because air collects in the wrong location.
Air lock is common after maintenance, after pipe filling, in long pipelines, in vertical risers, and in systems without proper venting. It can also occur in discharge lines, check valve chambers, heat exchanger loops, and multi-pump headers.
Where Air Lock Usually Happens
Air lock usually happens in the pump casing, discharge pipe high point, vertical riser, check valve chamber, heat exchanger loop, long horizontal pipeline, multi-pump header, or piping section where air cannot naturally escape.
The location matters because air trapped near the pump may prevent the pump from building pressure, while air trapped farther downstream may cause intermittent flow or pressure fluctuation.
Signs of Air Lock
Signs of air lock include weak flow, failure to build pressure, flow starting and stopping repeatedly, gurgling sounds in the pipe, air discharge at the outlet, and a pump that works after manual venting but fails again later.
If the pump repeatedly works only after manual venting, the system should be checked for poor air release, pipe high points, or a filling procedure that leaves air trapped.
How to Remove Air Lock
Air lock can often be removed by stopping the pump safely, opening the vent valve at the high point, filling the pump casing fully, checking discharge valve position, slowly restarting the pump, and confirming stable flow and pressure.
If air lock returns, the solution may require an automatic air release valve, pipe slope correction, better filling procedure, or piping redesign.
Installation and Piping Design Problems That Cause Air Inside a Pump
Installation and piping design problems often cause repeated air inside a pump. Even a good pump can collect air if the suction pipe slopes incorrectly, the pipe has high points, the inlet is too close to the liquid surface, or the pump is installed above its practical suction limit.
This section is important for buyers and contractors because replacing the pump will not correct poor pipe design. If the air problem started after installation or system modification, the installation should be reviewed before pump replacement.
Suction Pipe Has High Points
A suction pipe with high points can trap air pockets. These pockets may move into the pump during startup or high flow operation. The result can be unstable flow, noise, and repeated priming problems.
A suction line should be arranged so air can move toward a venting point or source tank instead of collecting in the middle of the pipe. Pipe slope matters more than many users expect.
Suction Pipe Diameter Is Too Small
A suction pipe that is too small can increase velocity and suction losses. This makes the pump more vulnerable to air entrainment, cavitation, and unstable inlet conditions.
A small suction line may work at low flow but create problems when demand increases. If air appears only at higher flow, pipe diameter, strainer blockage, and suction pressure should be checked.
Too Many Elbows Near Pump Inlet
Too many elbows near the pump inlet can disturb flow into the impeller. Poor inlet flow can contribute to vibration, noise, unstable pressure, and air-related symptoms.
Good suction design usually avoids excessive elbows, sudden reductions, and turbulent flow immediately before the pump inlet. A stable inlet flow helps the pump operate more smoothly.
Pump Installed Too High Above Water Source
A pump installed too high above the water source may be difficult to prime and may not have enough suction pressure. This increases the risk of air entry, loss of prime, cavitation, and startup failure.
If the pump repeatedly loses prime or struggles to lift water, check the suction lift, pump installation height, foot valve condition, and NPSH margin before replacing the pump.
Step-by-Step Troubleshooting When a Pump Has Air Inside
A safe troubleshooting process should start with operating symptoms, then check priming, liquid level, suction leaks, valves, pipe high points, cavitation indicators, and system design before replacing pump components.
This step-by-step order helps customers avoid random repairs. Venting the pump is useful, but if the air returns, the inspection must move upstream to the suction line, tank level, valves, and pipe layout.
Step 1: Identify When the Air Problem Appears
First identify when the air problem appears. Does air appear before startup, immediately after startup, after maintenance, during high flow, after shutdown, only when tank level is low, or only after long operation?
Timing provides the first clue. Air after maintenance often points to incomplete venting. Air after shutdown often points to foot valve or check valve leakage. Air at low tank level often points to vortex formation. Air during high flow often points to suction restriction or cavitation.
Step 2: Check Priming and Pump Casing Venting
Check whether the pump casing is fully filled with liquid and whether air has been properly vented. Open the vent point if the system is designed for it, and confirm that the pump is not started with air trapped inside the casing.
If the pump runs but does not build pressure after startup, poor priming should be checked before mechanical parts are replaced.
Step 3: Check Liquid Level and Vortex Formation
Check whether the liquid level is high enough and whether a vortex forms above the suction inlet. If the inlet is too close to the liquid surface, air can be pulled into the pump even though the pump and pipes are not leaking.
If vortex formation is visible, raise the liquid level, reposition the inlet, reduce inlet velocity, or install anti-vortex measures.
Step 4: Inspect Suction Pipe and Joints
Inspect flanges, threaded joints, flexible hoses, valve packing, pump inlet gaskets, and suction pipe sections. Look for cracked hoses, loose bolts, hardened gaskets, poorly sealed threads, and areas exposed to vibration.
If accessible, use a safe leak test method to confirm whether air is being pulled into the suction line.
Step 5: Check Foot Valve, Check Valve, and Backflow
Check whether liquid drains back after the pump stops. If the suction line loses liquid, air can enter and the pump may fail to prime next time.
A leaking foot valve or check valve should be repaired or replaced. Re-priming every day is not a normal operating method.
Step 6: Check Pipe High Points and Air Release Valves
Check whether the piping layout has high points where air can collect. Also check whether air release valves are installed, correctly located, and functioning.
If air collects in the same area repeatedly, the system may need an air release valve or pipe slope correction.
Step 7: Check Cavitation and NPSH Margin
Check suction pressure, suction lift, liquid temperature, strainer blockage, inlet pipe size, and pump operating point. If the pump has gravel-like noise, vibration, and reduced flow, cavitation may be present.
Cavitation is not solved by venting alone. The suction condition must be improved.
Step 8: Decide Whether the Problem Is Pump-Side or System-Side
If the pump works normally after venting but the air problem returns, the issue is usually system-side. If the pump has damaged seals, worn impellers, severe vibration, or internal damage, pump-side repair may also be needed.
This final step prevents the customer from replacing the pump when the real cause is a suction leak, valve failure, low liquid level, or pipe design issue.
Troubleshooting Tools Checklist for Air Inside Pump
Air inside a pump should be diagnosed with observable symptoms and basic field measurements. The goal is to confirm whether air comes from priming failure, suction leakage, low liquid level, valve leakage, piping high points, or cavitation.
The tools below help maintenance teams move from guessing to measurable diagnosis.
| Tool | What It Checks | Why It Matters |
| Pressure gauge | Suction and discharge pressure | Shows unstable suction or pressure fluctuation |
| Vacuum gauge | Suction-side vacuum condition | Helps detect excessive suction lift or restriction |
| Transparent hose section | Visible air bubbles | Helps confirm air entering suction line |
| Soap solution | Accessible suction joint leak check | Helps find air leaks at joints |
| Flow meter | Actual flow stability | Confirms whether air reduces output |
| Clamp meter | Motor current | Shows underload, overload, or unstable load |
| Infrared thermometer | Bearing/seal/pump casing temperature | Helps detect overheating caused by air or dry running |
| Vibration checker | Vibration caused by air or cavitation | Helps judge mechanical stress |
| System layout drawing | Pipe slopes, high points, valves | Helps locate trapped air zones |
| Pump curve / NPSH data | Operating condition | Helps judge cavitation or suction design limits |
Which Tool Should Be Used First?
Use a pressure gauge and field observation first because they quickly show whether the problem is unstable pressure, poor suction, or no-flow operation. Then check liquid level, priming, suction joints, and visible bubbles. More advanced checks such as vacuum testing, NPSH review, or pump disassembly should follow only after simple external causes are reviewed.
For hazardous, hot, chemical, or high-pressure systems, inspection should follow site safety rules and be handled by qualified personnel.
Decision Table: Vent, Seal, Repair, Redesign, or Replace?
The correct decision depends on where the air comes from. Some problems only need venting or re-priming, while others require suction sealing, valve replacement, piping correction, air release valves, or pump/system redesign.
The decision should be based on root cause, not only the symptom. If the pump has air because the suction line leaks, venting is temporary. If the pipe layout traps air, replacing the pump is usually ineffective. If cavitation has damaged the impeller, both suction correction and pump repair may be needed.
| Root Cause | Best Decision | Why |
| Air after maintenance | Vent and re-prime | Often temporary if system is sealed |
| Loose suction joint | Seal or replace gasket | Air will keep entering under suction |
| Low tank level | Raise operating level or reposition inlet | Prevents vortex and air intake |
| Foot valve leakage | Repair or replace foot valve | Prevents loss of prime after shutdown |
| Pipe high point | Add vent or correct pipe slope | Prevents repeated air pockets |
| Suction lift too high | Lower pump or redesign suction | Reduces priming and NPSH problems |
| Cavitation | Improve suction condition | Prevents impeller and seal damage |
| Repeated seal failure | Repair root hydraulic cause | Seal may be symptom, not root cause |
| Wrong pump type | Reselect pump | Air handling ability may not match system |
If air inside the pump is followed by leakage around the seal area, this pump seal leak troubleshooting guide can help maintenance teams check whether air, dry running, cavitation, or suction instability is damaging the mechanical seal.
When You Should Not Replace the Pump Yet
A pump with air inside does not always need replacement. If the real cause is poor priming, suction leakage, low liquid level, foot valve failure, or pipe high points, a new pump may have the same problem.
This section is important for purchasing decisions. A new pump may appear to solve the issue briefly, but the same air problem will return if the suction system is still leaking or the pipe layout still traps air.
Do Not Replace the Pump Before Checking Suction Leaks
Do not replace the pump before checking suction leaks because a leaking suction line will pull air into any pump installed in the same position. Replacing the pump without sealing the suction line wastes money and delays the real repair.
Do Not Replace the Pump Before Checking Liquid Level
Do not replace the pump before checking liquid level because low liquid level or vortex formation can cause repeated air entry. A new pump may still pull air if the inlet is too close to the liquid surface.
Do Not Replace the Pump Before Checking Foot Valve or Check Valve
Do not replace the pump before checking the foot valve or check valve. If liquid drains back after shutdown, the pump may lose prime again regardless of pump condition.
Do Not Replace the Pump Before Checking Pipe Design
Do not replace the pump before checking pipe design because high points, wrong slopes, excessive suction lift, or poor inlet design can cause repeated air problems. In these cases, redesign is more effective than pump replacement.
When You Should Contact a Pump Supplier or Engineer
A supplier or engineer should be contacted when air problems repeat after venting, suction leaks cannot be located, cavitation is suspected, the pump repeatedly loses prime, or the system requires piping redesign.
Professional support is also important when the system handles hot liquids, chemicals, hazardous fluids, high-pressure conditions, or critical process service. In these cases, trial-and-error troubleshooting can be unsafe and expensive.
Contact a Supplier When
Contact a pump supplier when the pump repeatedly loses prime, air bubbles return after sealing joints, pump flow remains unstable, mechanical seal fails repeatedly, cavitation noise continues, the pump is used outside its normal duty point, or the pump type may not suit the system.
A supplier should not recommend only a new pump without asking about suction conditions, tank level, liquid properties, pipe layout, valves, and operating history.
Contact an Engineer When
Contact an engineer when suction lift is high, the pipe layout has multiple high points, the system handles hot liquid, NPSH margin is uncertain, the pump serves critical process equipment, hazardous liquid is involved, or multiple pumps share one suction header.
These conditions often require system-level review, not only pump repair.
Supplier Data Checklist
A supplier can diagnose the air problem more accurately when the customer provides system data, not only a pump model. The table below shows what to prepare before asking for a recommendation.
| Data Type | What to Provide | Why It Matters |
| Pump category | End suction, inline, booster, multistage, irrigation, etc. | Confirms applicable diagnosis |
| Pump data | Flow, head, speed, power, pump curve | Checks duty point |
| Liquid data | Water, temperature, solids, viscosity | Affects air release and cavitation |
| Suction condition | Tank level, suction lift, pipe size | Identifies air entry risk |
| Failure symptom | Bubbles, noise, loss of prime, low flow | Determines troubleshooting path |
| Pipe layout | High points, elbows, valves, length | Finds trapped air zones |
| Photos/videos | Pump, suction pipe, tank, gauge behavior | Helps remote diagnosis |
| Maintenance history | Recent gasket/valve/pump changes | Identifies post-maintenance air entry |
If air problems keep returning after venting and suction checks, this water pump types explained guide can help buyers compare pump categories before changing the system or requesting a replacement.
Common Mistakes Customers Make When Pump Has Air Inside
Many air-related pump problems become expensive because customers only vent the pump repeatedly without finding why air keeps entering. Repeated air problems are usually a system signal, not a one-time event.
Avoiding these mistakes helps reduce downtime, seal replacement cost, energy waste, and unnecessary pump replacement.
Only Venting the Pump Without Finding the Air Source
Only venting the pump solves the symptom, not the cause. If air returns after venting, the source may be a suction leak, low tank level, leaking valve, pipe high point, or cavitation.
Repeated venting should trigger a root-cause inspection.
Running the Pump with No Discharge Flow
Running the pump with no discharge flow can cause overheating, dry running, seal damage, and internal wear. If the pump runs but no water comes out, stop the pump and check priming, air lock, suction blockage, and discharge path.
Ignoring Suction-Side Leaks Because No Water Leaks Out
Ignoring suction-side leaks is a common mistake because many suction leaks do not show visible water leakage. Under vacuum, the line may pull air inward instead of pushing water outward.
A dry joint can still be an air leak.
Confusing Cavitation with Simple Air Lock
Confusing cavitation with simple air lock can lead to repeated failure. Air lock may improve after venting, while cavitation requires improved suction pressure, lower losses, better NPSH margin, or operating point correction.
If gravel-like noise and impeller damage appear, cavitation should be considered.
Replacing the Pump Without Correcting Piping
Replacing the pump without correcting piping may not solve repeated air problems. If the pipe traps air, the suction lift is too high, or the inlet creates vortex, the new pump may experience the same symptoms.
System correction should come before pump replacement when the root cause is outside the pump.
FAQ About Air Inside Pump
Air inside a pump is a common field problem, but the correct answer depends on when the air appears, how often it returns, and whether it causes noise, low flow, vibration, or seal leakage. The questions below address the most common customer concerns.
Why is there air inside my pump?
There is air inside your pump because the pump casing or suction line is not fully filled with liquid, or air is entering through suction leaks, low liquid level, vortex formation, leaking foot valves, leaking check valves, pipe high points, incomplete priming, or cavitation-related suction problems.
The first checks should include priming, suction pipe sealing, liquid level, visible bubbles, foot valve condition, and whether the pump loses prime after stopping.
Can air inside a pump damage the pump?
Air inside a pump can damage the pump if it causes dry running, cavitation, vibration, seal failure, unstable flow, or overheating. Small trapped air after maintenance may be harmless if removed quickly, but repeated air entry should be treated as a root-cause problem.
Seal leakage, bearing temperature rise, severe vibration, or no-discharge operation means the pump should be stopped and inspected.
How do I remove air from a pump?
You remove air from a pump by stopping the pump safely, opening the proper vent point, filling the pump casing and suction line with liquid, confirming the pump is fully primed, slowly restarting, and checking whether pressure and flow stabilize.
If air returns after venting, do not keep repeating the same step. Check suction leaks, low liquid level, foot valve leakage, pipe high points, and cavitation risk.
Why does my pump keep getting air after priming?
A pump keeps getting air after priming when the system cannot hold liquid or keeps pulling air into the suction path. Common causes include suction-side leakage, foot valve leakage, check valve failure, low tank level, vortex formation, high suction lift, or a pipe high point that traps air.
Repeated loss of prime is usually not solved by re-priming alone.
Is air in the pump the same as cavitation?
Air in the pump is not the same as cavitation. Air entrainment means external air enters or remains trapped in the system. Cavitation means vapor bubbles form because local pressure drops below the liquid’s vapor pressure.
They can look similar because both may cause noise, vibration, unstable pressure, and reduced flow. However, their solutions are different. Air entrainment requires leak sealing and venting; cavitation requires improved suction conditions and better NPSH margin.
Can a suction leak pull air into the pump without leaking water?
A suction leak can pull air into the pump without leaking water. This happens because the suction line may operate below atmospheric pressure. Air is pulled inward through small gaps, but water may not drip outward.
This is why dry suction joints, old gaskets, and valve packing can still be air entry points.
Should I replace the pump if it has air inside?
You should not replace the pump immediately just because it has air inside. First check priming, suction leaks, liquid level, foot valve, check valve, pipe high points, air release valves, and cavitation conditions.
Pump replacement should be considered only if the pump is damaged, unsuitable for the system, unable to operate at the required duty point, or repeatedly fails after the system-side causes are corrected.
Does this troubleshooting guide apply to all pumps?
This troubleshooting guide does not apply to all pumps without adjustment. It is most suitable for clean-water centrifugal pumps, booster pumps, pipeline pumps, multistage pumps, irrigation pumps, HVAC circulation pumps, and general transfer pumps.
Chemical pumps, fire pumps, high-temperature pumps, vacuum pumps, slurry pumps, sewage pumps, and hazardous liquid systems require adjusted troubleshooting based on the pump type, liquid properties, safety risk, and applicable standards.
Conclusion
Air inside a pump is usually a system problem, not only a pump problem. The correct solution is to find how air enters, where it collects, and why it returns after venting.
If the air is only a small amount left after maintenance, venting and re-priming may be enough. If the air returns repeatedly, check suction leaks, low liquid level, vortex formation, foot valve leakage, check valve failure, pipe high points, and cavitation. If the air problem comes with noise, vibration, low flow, unstable pressure, seal leakage, or overheating, the pump should not continue running until the root cause is identified.
For customers, the most important decision is not “How do I remove the air once?” but “Why does the air keep entering?” If the problem is a suction leak, seal the suction line. If the problem is low liquid level, correct the inlet condition. If the problem is a leaking foot valve, repair the valve. If the problem is trapped air in pipe high points, add air release or correct the piping. If the problem is cavitation, improve suction pressure and NPSH margin. If the pump type or system design does not match the application, review the pump selection before buying another pump.
A reliable pump system should stay full of liquid, maintain stable suction, avoid trapped air, and operate within its correct duty range. Solving air inside a pump requires system thinking, not only pump replacement.
Get A Quote

Get A Quote
0 Comments