
Self Priming Pump Guide: How It Works, 25-Foot Lift Limits, and RFQ Specs
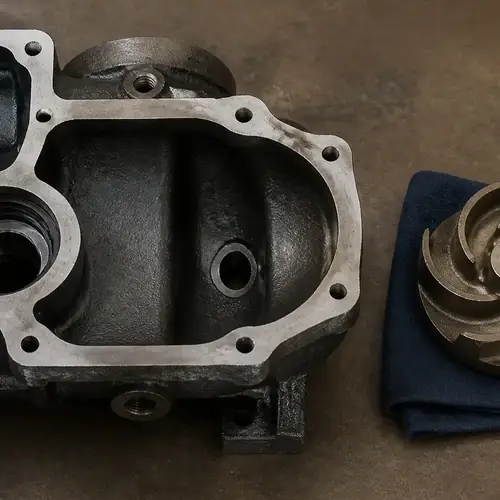
A self priming pump is a centrifugal pump with a built-in liquid reservoir that automatically evacuates air from the suction line at startup, allowing it to pull water from below the pump without manual priming. The practical engineering limit is 25 feet (7.6 meters) of suction lift at sea level, and the casing must be charged with liquid before the first start. This guide breaks down the priming cycle, lift physics, solids handling, installation rules, and the supplier checks that stop expensive priming failures on site.
Most priming failures on a construction site, bypass job, or wastewater transfer point aren't caused by a defective pump. They're caused by three controllable things: the site tries to lift water too far, the suction line leaks air, or the pump casing was never filled with liquid before startup. That combination creates downtime, burned mechanical seals, and a warranty fight that usually ends badly for the buyer who wrote an incomplete RFQ.
Before you request pricing, confirm one number: your exact suction lift, measured from the water surface to the pump centerline. If it's above roughly 25 feet, stop and look at a submersible or vertical turbine instead. If it's within that window, the rest of this guide gives you the technical and sourcing detail to specify the right self priming centrifugal pump without buying on a guess.
Quick Answer: The 30-Second Buyer Decision
Use a self priming pump when all of these are true:
- The pump must sit above the liquid source, not inside it.
- Suction lift is no more than approximately 25 feet at sea level.
- You can fill the pump casing with liquid before the first start.
- The fluid is water, wastewater, light slurry, or liquids with limited solids.
- Startup is intermittent or unattended, and you don't want an operator standing there priming every cycle.
Do not use one when the suction lift exceeds safe limits, when the suction line can't be made airtight, or when the fluid contains large, stringy solids that the impeller was never sized to pass. If you're still deciding between a standard flooded-suction centrifugal and a self priming model, the dedicated comparison is covered separately in our guide to self priming vs centrifugal pump.
Scope of This Guide
This article focuses on the operating principle, suction lift boundaries, solids handling options, installation rules, and buyer-side RFQ and supplier verification for industrial self priming pumps. It's written for engineering project managers, mechanical contractors, pump distributors, OEM buyers, and maintenance engineers who need to make a defensible specification decision.
What this guide does not do is repeat a full pump thermodynamics textbook, nor does it provide an exhaustive submersible pump selection path. Submersible pumps appear only as the correct alternative when self priming lift cannot work. If you need a deeper technical comparison between self priming and standard centrifugal construction, start with our engineering differences article before returning here.
What Is a Self Priming Pump and How Does the Priming Cycle Work?
A standard end-suction centrifugal pump cannot reliably pump air. If its casing is filled with air, the relatively light air remains in the impeller and the pump cannot develop enough pressure to move liquid. A self priming centrifugal pump solves this by combining an oversized casing liquid reservoir with an internal recirculation passage.
The critical difference is what happens at startup. Before the first start, the operator fills the pump casing with liquid through the fill port. That liquid stays in the reservoir. When the motor starts, the rotating impeller mixes the retained liquid with the air drawn from the suction line. The air-liquid mixture is thrown outward through the discharge zone, where the heavier liquid separates from the air. The air is discharged out the pump, while the remaining liquid recirculates back into the impeller through an internal passage. This cycle repeats until the suction line has been evacuated and the pump transitions into normal liquid pumping.
That's why the initial casing fill is non-negotiable. The pump doesn't create the first prime from completely dry internals. It re-primes using the liquid that was left inside from the previous fill or the previous run. Most industrial self priming pumps include an internal check valve at the suction inlet to hold that liquid when the pump stops. If the check valve leaks or the suction line allows air to enter during idle, the pump can lose its prime and fail to restart.
Priming time depends on the volume of air in the suction pipe, the casing reservoir volume, the impeller speed, and the vertical lift. A properly sized unit with a short suction line often reaches prime in roughly 30 to 120 seconds; that exact window is something to confirm against your specific pipe length and diameter. If the pump is still slugging after two minutes, don't keep running it. Stop, refill the casing, and inspect the suction side for air leaks.
Suction Lift Limitations: The 25-Foot Engineering Rule
The most important buyer number for a suction lift pump is not total head. It's the vertical distance from the water surface to the pump centerline, because that distance consumes atmospheric pressure before the pump can do useful work.
At sea level, standard atmospheric pressure can theoretically support a water column of about 33.9 feet (10.3 meters). In practice, you never get all of that. The pump needs a margin above its required net positive suction head, the liquid has vapor pressure, and the suction pipe has friction. That's why the accepted practical maximum suction lift for most industrial self priming pumps is about 25 feet (7.6 meters) at sea level. Cross that boundary and the pump is likely to cavitate or simply refuse to prime, regardless of what the motor looks like on the data plate.
The physical relationships matter more than a simple rule of thumb. Available net positive suction head at the pump inlet is roughly:
NPSHa = atmospheric pressure head - static lift - suction friction loss - vapor pressure head
A worked example helps. At sea level with clean water around 70°F, atmospheric head is roughly 33.9 feet and vapor pressure head is under 1 foot. With a static lift of 20 feet and another 3 feet of suction friction, NPSHa lands near 10 feet. The pump's NPSH required must sit comfortably below that at the duty flow. Push the static lift to 26 feet, add friction, and the margin can disappear.
What reduces safe suction lift in the real world
| Factor | Impact on practical lift | Engineering mitigation |
|---|---|---|
| Altitude above sea level | Lower atmospheric pressure directly reduces available suction lift | Obtain a derated curve for site elevation; do not use a sea-level selection |
| Fluid temperature | Higher vapor pressure reduces NPSHa and can cause cavitation at lower lifts | Check fluid temperature before quoting; hot water and condensate need much lower lift |
| Suction pipe friction | Every elbow, fitting, and foot valve adds a loss that reduces net lift margin | Size the suction line at or above pump inlet diameter; minimize fittings and run length |
| NPSH required | Pump model, impeller condition, and flow point all change NPSHr | Ask for the factory NPSHr curve at the quoted duty flow |
| Suction line air leaks | Air in the line acts like extra friction and can stall the prime entirely | Specify rigid, vacuum-rated pipe and vacuum-test or leak-test all joints before commissioning (a pressure test alone will not reveal a vacuum-side leak) |
At higher elevation, atmospheric pressure supports a shorter water column than at sea level, so the same site lift leaves less usable margin. That does not mean a safe 25-foot lift becomes 20 feet by a generic formula, but it does mean the supplier should confirm derated suction performance for the specific site elevation. The same applies to warm wastewater or any liquid with higher vapor pressure than clean cold water.
If the site cannot stay within the practical window, don't force a self priming pump. A submersible pump goes into the liquid and eliminates suction lift entirely. That's usually the right call for deep pits, wet wells, or variable source levels where the water surface can drop below the pump's range during low season.
Types of Self Priming Pumps: Clear Water vs. Trash Pumps
The next decision is what the pump has to pass. A self priming centrifugal pump specified for clean water won't survive a construction pit full of sand, mud, and gravel. A trash self priming pump is a different machine with a different impeller, casing, and wear strategy.
A standard clear-water self priming pump usually handles clean or lightly contaminated water, irrigation transfer, cooling water, temporary bypass, and liquids without significant solids. These pumps are often lighter, simpler, and good when the fluid is mostly water. They're not the right tool for sewage, heavy sludge, or abrasive site runoff.
A trash self priming pump is designed for wastewater, construction dewatering, flooded basements, and slurry. The main differences show up in the wet end. The impeller is typically open or semi-open rather than fully closed, which leaves a wider passage for solids. A replaceable wear plate sits inside the casing, and the solids passage is usually quoted as a spherical diameter. Depending on the pump size and manufacturer, that can range from a fraction of an inch on small models to 2 inches, 3 inches, or more on larger units. You must confirm the number, because "handles trash" means nothing without a spherical solid size and an impeller type.
For municipal sewage or industrial wastewater, a wastewater self priming pump is often selected when the pump must sit above grade for maintenance access or when the station can't accept a submersible. It's not a substitute for proper station sizing. The pump still has to match the wet well level, the expected solids load, and the station control strategy. If this is a lift station application, review our wastewater lift station pump sizing guide before settling on model selection.
Material selection determines how long the "self priming" part keeps working
- Cast iron is the default wetted material for general clean water and light wastewater. It's cost-effective but doesn't resist highly abrasive or corrosive service.
- 304 or 316 stainless steel wetted parts help when the liquid is corrosive or when clean-in-place requirements demand smoother surfaces. Confirm the grade, because 304 and 316 behave differently in chloride.
- High-chrome alloy wear plates and impellers are common in slurry and heavy trash variants because abrasion, not corrosion, is the primary failure mode.
- Mechanical seal faces matter just as much as casing material. For dirty water and light slurry, silicon carbide against silicon carbide or silicon carbide against tungsten carbide is common. Ask what the factory proposes and why.
The decision order is: define the largest solid the pump will actually see, specify the impeller type to pass it, then choose wetted materials for the fluid chemistry and abrasion. Don't pick the material first.
Installation Rules to Prevent Pump Priming Problems
Most pump priming problems in the field happen because the suction side was treated as a plumbing afterthought. A self priming pump creates a vacuum in the suction line during the priming cycle. A tiny leak that you would never notice on a pressurized pipe can pull air in, break the vacuum, and stop the pump from ever establishing flow.
The first rule is airtight piping. Use rigid pipe sized to at least the pump inlet diameter, with properly compressed gaskets on flanged joints. If the site insists on flexible hose, it must be vacuum-rated spiral-reinforced hose on the suction side. A collapsible discharge hose mounted on the suction inlet is a common construction-site failure; it flattens under vacuum and chokes the flow.
The second rule is geometry. The suction line should rise continuously from the liquid source toward the pump inlet so air bubbles move uphill to the priming chamber instead of collecting in a high pocket. Avoid sags, loops, and steep local high points. Keep the suction run as short as practical, because every extra foot adds friction and increases priming time. A straight section of several pipe diameters at the pump inlet gives the flow a chance to stabilize before the impeller.
Don't add a foot valve just because someone on site insists it's standard practice. Most self priming pumps already use an internal check valve to retain casing liquid. An external foot valve adds suction friction, adds a maintenance point, and is generally not required. If the pump loses its prime between starts, inspect the internal check valve and the suction joints before adding more hardware to the system.
Troubleshooting common self priming pump failures
| Symptom | Likely root cause | Corrective action |
|---|---|---|
| Pump runs but never primes within two minutes | Casing not charged, suction air leak, suction lift too high, suction pipe too long or too small | Stop motor, refill casing, check all suction joints, verify lift, shorten or upsize suction pipe |
| Pump primes, then loses prime during shutdown | Internal check valve leaking or suction line opening to atmosphere | Inspect check valve, reseal suction joints, confirm liquid level in casing before restart |
| Pump is loud or vibrates during priming | Air ingestion, low liquid reservoir, suction line partially collapsing | Refill casing, verify vacuum-rated suction hose, check for air leaks |
| Pump primes but delivers low flow | Clogged impeller or wear plate, system head higher than quoted, air still entering after prime | Clear solids, compare actual duty with the tested curve, inspect wear plate clearance |
| Pump cavitates at higher lift | NPSHa margin too small at site altitude or fluid temperature | Reduce static lift, shorten suction line, select a model with lower NPSHr, or switch to a submersible |
If the pump primes but still can't reach the required flow, the issue is usually on the discharge or system side. Our guide to pump flow rate problems walks through that diagnosis without guessing at impeller damage.
B2B Sourcing: Quality Control and RFQ Checklist for Self Priming Pumps
A catalog can show a beautiful performance curve. The question is whether the factory can reproduce that curve on the serial-number pump they actually ship to you. For self priming pumps, the two biggest sourcing risks are overstated suction lift and weak casing vacuum integrity. Both show up as failures only after the pump is already on site.
Supplier verification: what to demand before you commit
Ask the manufacturer to confirm the hydraulic performance test against ISO 9906, including the acceptance grade. The test report should show the measured flow, head, power, and NPSH required for the exact impeller diameter you're buying, not just a generic family curve. If a supplier only sends a catalog page, treat that as a red flag.
Also request the casing pressure and vacuum test certificate. A self priming pump must hold vacuum during priming and hold pressure during normal operation. A casting that passes hydrostatic pressure can still leak air under vacuum, so the vacuum test specifically matters.
Request dynamic balance records and material certificates for the impeller, wear plate, and shaft. When solids or wastewater are involved, confirm the mechanical seal model and face materials in writing. Ask what the factory's pre-shipment inspection includes: dimensional checks, assembly inspection, paint specification, and a documented final run test if available.
A buyer should also remember that sourcing a pump is not just buying the wet end. Export packaging directly affects landed condition. Sea freight and condensation can damage pumps when the factory drains the casing but doesn't protect the motor and control terminals. Reasonable export packaging means heavy-duty wooden crates, steel strapping, moisture barriers, and sealed motor terminal protection. Ask for a packing photo or drawing before shipment. The initial price saving disappears quickly if the unit arrives with a wet motor and a rusted shaft.
RFQ checklist: the exact data to send for a technically valid quote
Most RFQs for self priming pumps are too vague. A clean two-column data sheet is easier to evaluate than a paragraph of intentions. Use the table below as the minimum technical package to send Liqen or any manufacturer you are shortlisting.
| Field | Your input / options |
|---|---|
| Flow rate at duty point | m³/h or GPM, with minimum, duty, and maximum if applicable |
| Total dynamic head | m or ft, including static lift, discharge pressure, and all friction losses |
| Exact suction lift | vertical distance from water surface to pump centerline, in ft or m |
| Fluid type and specific gravity | clean water, wastewater, slurry, condensate, other |
| Maximum solid size and type | spherical diameter in inches or mm; describe fibrous or abrasive material |
| Fluid temperature | °C or °F at normal and maximum operating condition |
| Power supply | voltage, phase, frequency, and available starting method |
| Site altitude | m or ft above sea level for suction lift derating |
| Duty cycle | continuous, intermittent, standby, or emergency |
| Installation configuration | fixed baseplate, skid, trailer, or engine-driven |
| Required documentation | ISO 9906 curve, material certificates, vacuum test, dimensional drawing, packing list |
| Target quantity and delivery | quantity and required on-site date, so the supplier can confirm commercial feasibility |
If you're preparing a broader water transfer RFQ, the same principle applies: more site data means fewer surprises. Our water transfer pump RFQ checklist covers the additional pipe loss, duty cycle, and site condition details that many pump RFQs skip.
What to say to a supplier who pushes back
Not every factory will want to send a vacuum test or a full ISO 9906 report. That's exactly when the buying decision gets easy. A supplier who refuses to document suction lift capability is telling you they haven't verified it. For a larger industrial pump whose entire value is reliable priming, that's a disqualifier — smaller commodity pumps more commonly rely on batch/type testing rather than a unit-specific report, so scale the expectation to the pump size and the criticality of the application. You don't need to be hostile about it. You simply ask the same three questions a professional buyer asks: Where is the tested curve, what is the casing vacuum test result, and what is the pump's NPSHr at my duty point? The answers tell you whether this is a manufacturer or a middleman with a data sheet.
Common Mistakes That Produce Field Failures
Most failed self priming installations share one of a small number of avoidable mistakes. They're worth listing because each one is cheaper to prevent than to fix on site.
- Trusting the motor horsepower instead of the curve. A pump with enough motor can still fail to prime if the casing reserves are poor or NPSHr is too high at the duty flow. Work from the tested curve, not the horsepower rating.
- Ignoring altitude and fluid temperature. Specifying at sea level and then installing at elevation is a good way to get a cavitating pump. Supply altitude and temperature on the RFQ, not after the order.
- Using the wrong suction hose. Collapsible hose, undersized pipe, or a high loop are all classic causes of pump priming problems that no pump replacement will fix.
- Assuming all self priming pumps handle trash. The term only describes the priming method, not solids capability. A clear-water self priming pump is not a trash self priming pump.
- Skipping the initial casing fill. This feels like an operator issue, but it often starts with the buyer not documenting the startup requirement for the installation crew. Write it into the O&M instructions and the commissioning checklist.
- Buying on price without vacuum test documentation. The cheap unit usually looks identical until the suction lift gets difficult and the casing leaks air through a porosity defect that was never tested.
FAQ: Self Priming Pump Questions Buyers Ask Before Quoting
These are the questions that come up after a buyer has read the datasheet but before they're ready to issue an RFQ.
Does a self priming pump need a foot valve?
Normally it doesn't. A self priming pump uses an internal check valve and its casing reservoir to retain liquid between starts. Adding an external foot valve adds suction-side friction and creates another part to clog or fail. Some systems still use one as a secondary safeguard, but you shouldn't assume it's required. Confirm the manufacturer's recommendation for the specific model and lift condition.
Can a self priming pump run dry?
No. The pump must have liquid in the casing before the first start, and it needs retained liquid to re-prime after shutdown. It can tolerate short periods of air handling during the priming cycle, but it's not a dry-run pump. Running it with an empty casing can destroy the mechanical seal and score the wear surfaces.
How long does a self priming pump take to prime?
For a well-designed installation with short suction pipe and a lift within the practical limit, typical priming time is in the range of roughly 30 to 120 seconds. Larger suction lines, longer pipe runs, higher lift, and air leaks all extend that. If the pump is still slugging after about two minutes, stop it and find the air leak or lift problem before continuing.
What is the maximum suction lift for a self priming pump?
The practical maximum is approximately 25 feet (7.6 meters) at sea level for clean water at normal ambient temperature. That limit falls with altitude, fluid temperature, suction line friction, and the specific pump's NPSH requirement. Don't treat 25 feet as a guaranteed number for every site; treat it as the ceiling to verify against site conditions.
Can a self priming pump handle sewage or solids?
A standard clean-water self priming pump shouldn't be used for sewage. A wastewater or trash self priming pump is designed with a semi-open or open impeller and a larger solids passage. You must confirm the maximum spherical solid size and material choice for the actual waste stream. If the pump must handle heavy ragging or large debris, submersible solids-handling pumps may be the safer comparison.
How is a self priming pump different from a normal centrifugal pump?
A normal centrifugal pump needs either a flooded suction or external priming assistance, while a self priming pump carries liquid in its casing and uses an internal air-liquid separation cycle to clear the suction line on its own. That design trade-off usually comes with a slightly different wet end and a suction-lift ceiling around 25 feet. For a direct side-by-side selection view, review our self priming vs centrifugal pump comparison.
Official Sources and Compliance References
The primary standard to anchor your quality requirements is ISO 9906, which defines hydraulic performance acceptance tests for rotodynamic pumps. When you ask a factory for a test curve, specify that the performance verification follows ISO 9906 and state the acceptance grade. That single line in your RFQ changes the conversation from marketing numbers to measured performance.
NPSH methodology and suction lift calculation follow standard hydraulic practice based on atmospheric pressure, fluid vapor pressure, and friction loss. Exact vapor pressure data and altitude corrections should come from the supplier's application engineers or a trusted fluid properties source for the specific liquid and site condition. Don't accept a generic "this pump lifts 30 feet" claim without a tested curve and a documented NPSHr value.
Bottom Line: How to Buy a Self Priming Pump Without Regretting It
The selection path is clear. Measure the suction lift first. If the vertical distance from the water surface to the pump centerline is beyond the practical limit, stop looking at self priming pumps and move to a submersible or vertical turbine. If the lift is within roughly 25 feet at your altitude and temperature, then specify the pump around four things: the tested hydraulic curve, the solids or fluid condition, the airtight suction pipe design, and the factory documentation that proves the casing will actually hold vacuum.
Send the supplier a complete RFQ, not a one-line request for price. Require the ISO 9906 test curve, the casing vacuum test, material certificates, and a defined impeller and solids passage. If those documents are missing, the supplier hasn't de-risked your order. A self priming pump is a practical, field-proven machine when it's applied inside its real engineering boundary. The failures come when buyers ignore that boundary to save a few minutes at RFQ stage.
For further reading, start with the self priming vs centrifugal pump engineering differences guide, then move into the wastewater or water transfer RFQ articles if your application is solids-heavy or project-driven. That order follows the actual decision path: confirm the pump type, define the duty, then force a supplier to prove the performance.
Get A Quote

Get A Quote
0 Comments